

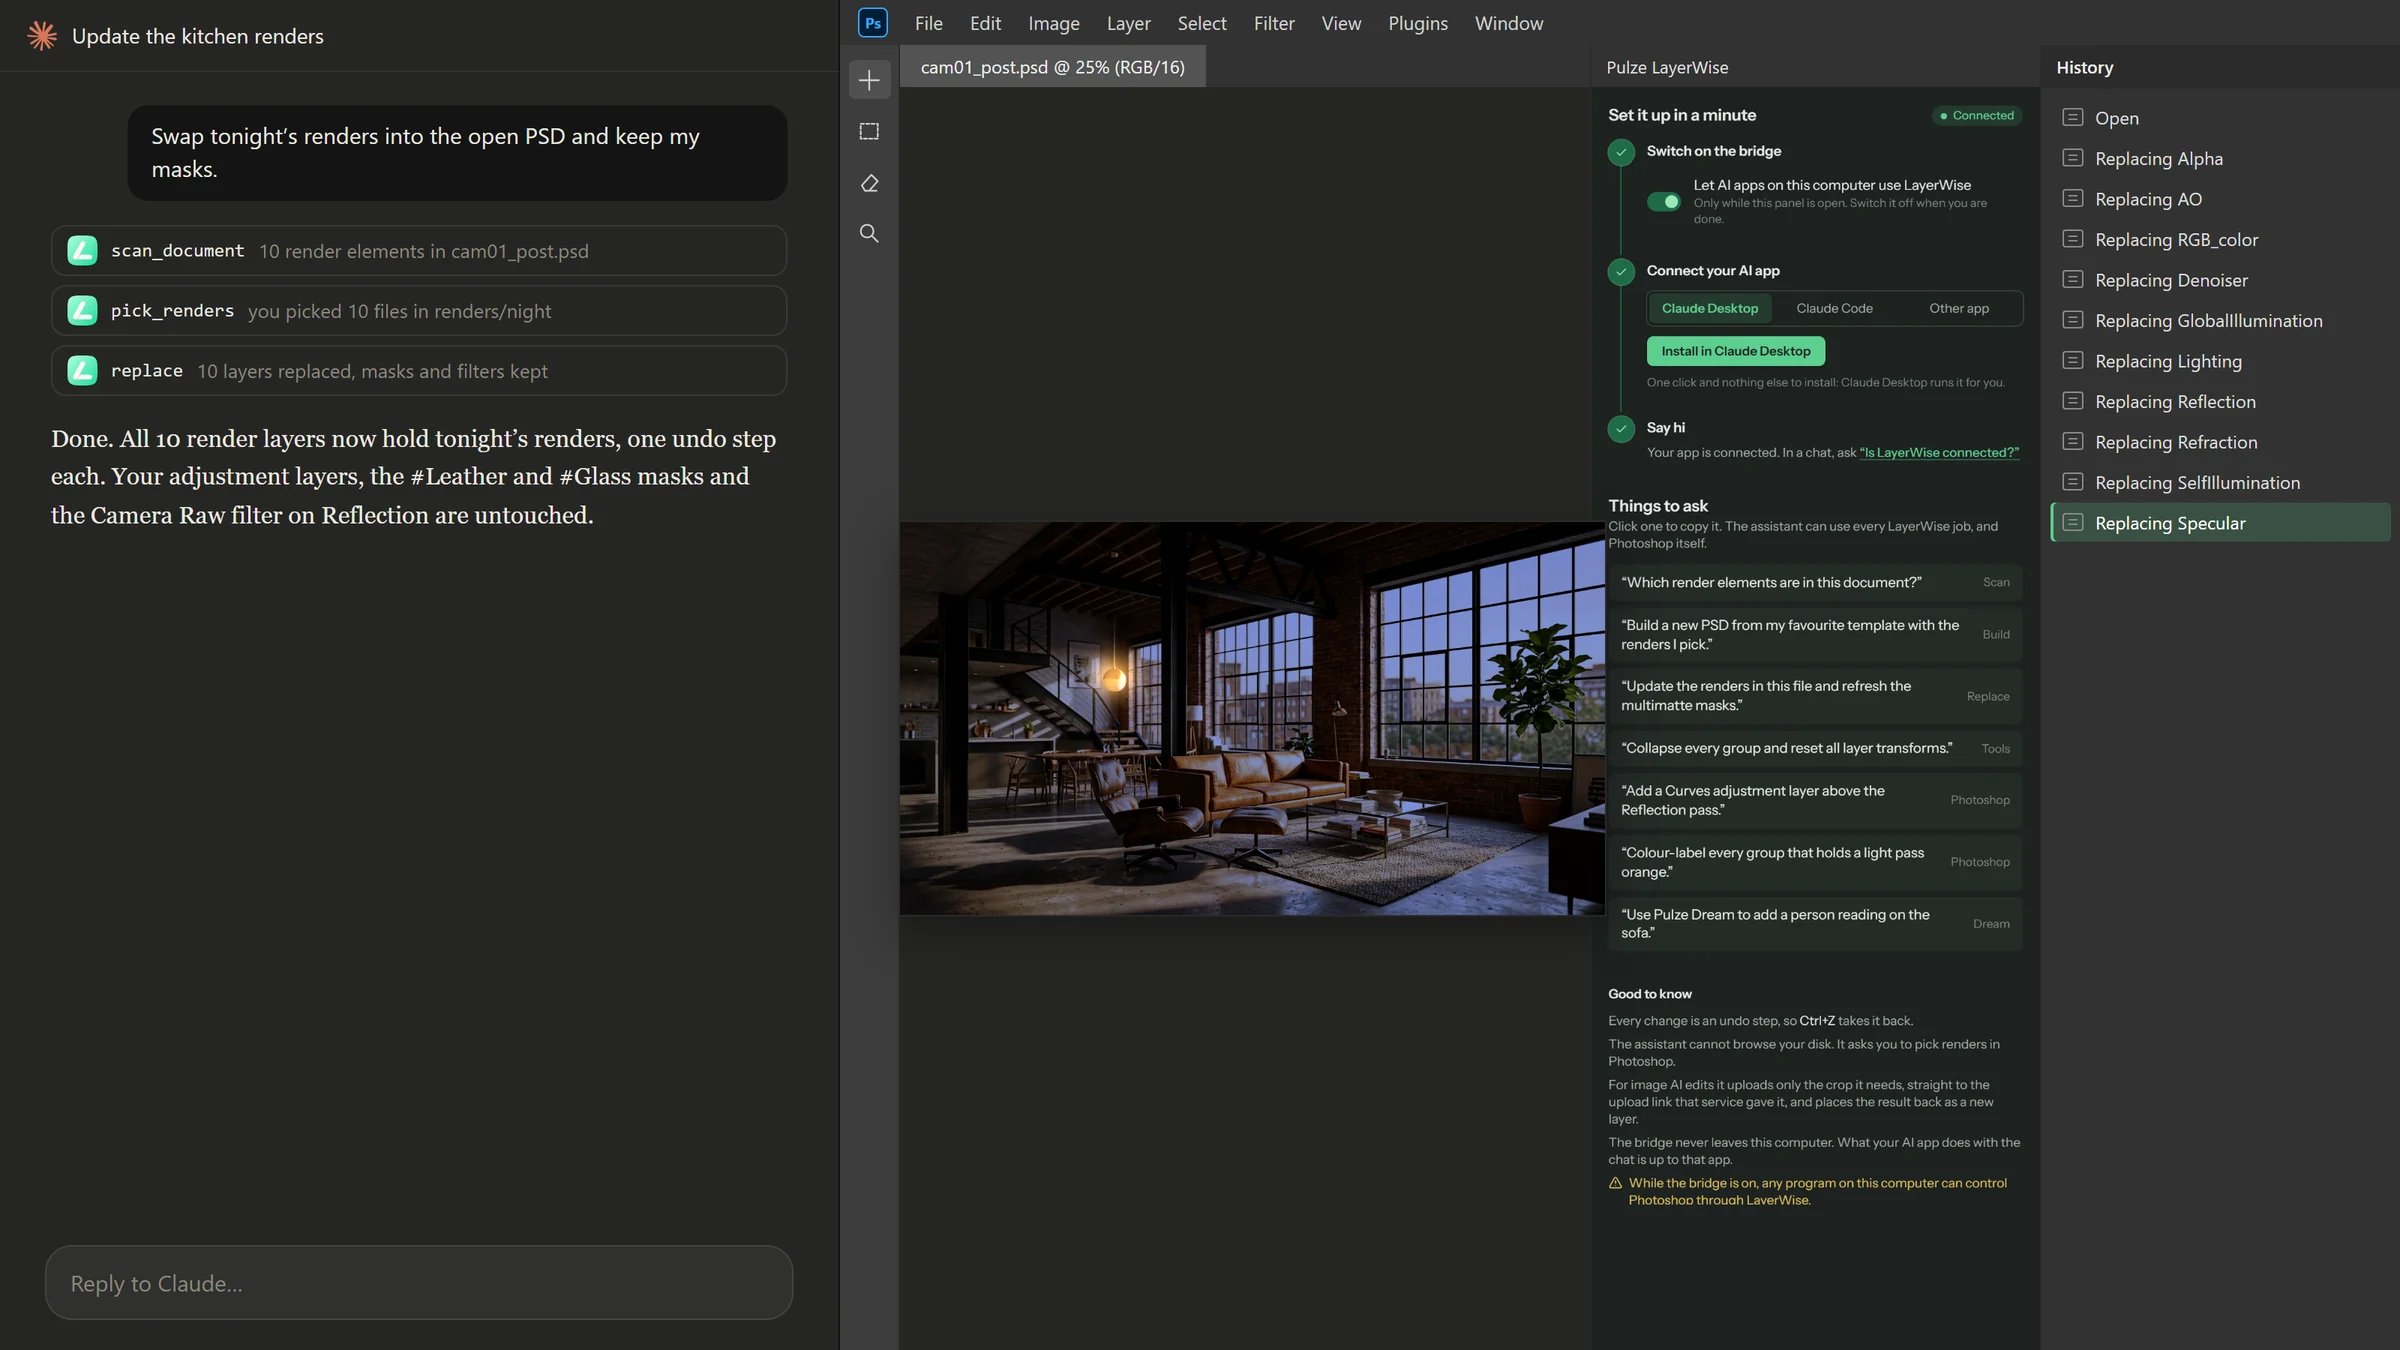
Claude running LayerWise jobs in Photoshop
Set it up
Open the menu → AI assistant. The page walks you through three steps, and each one ticks itself off when done.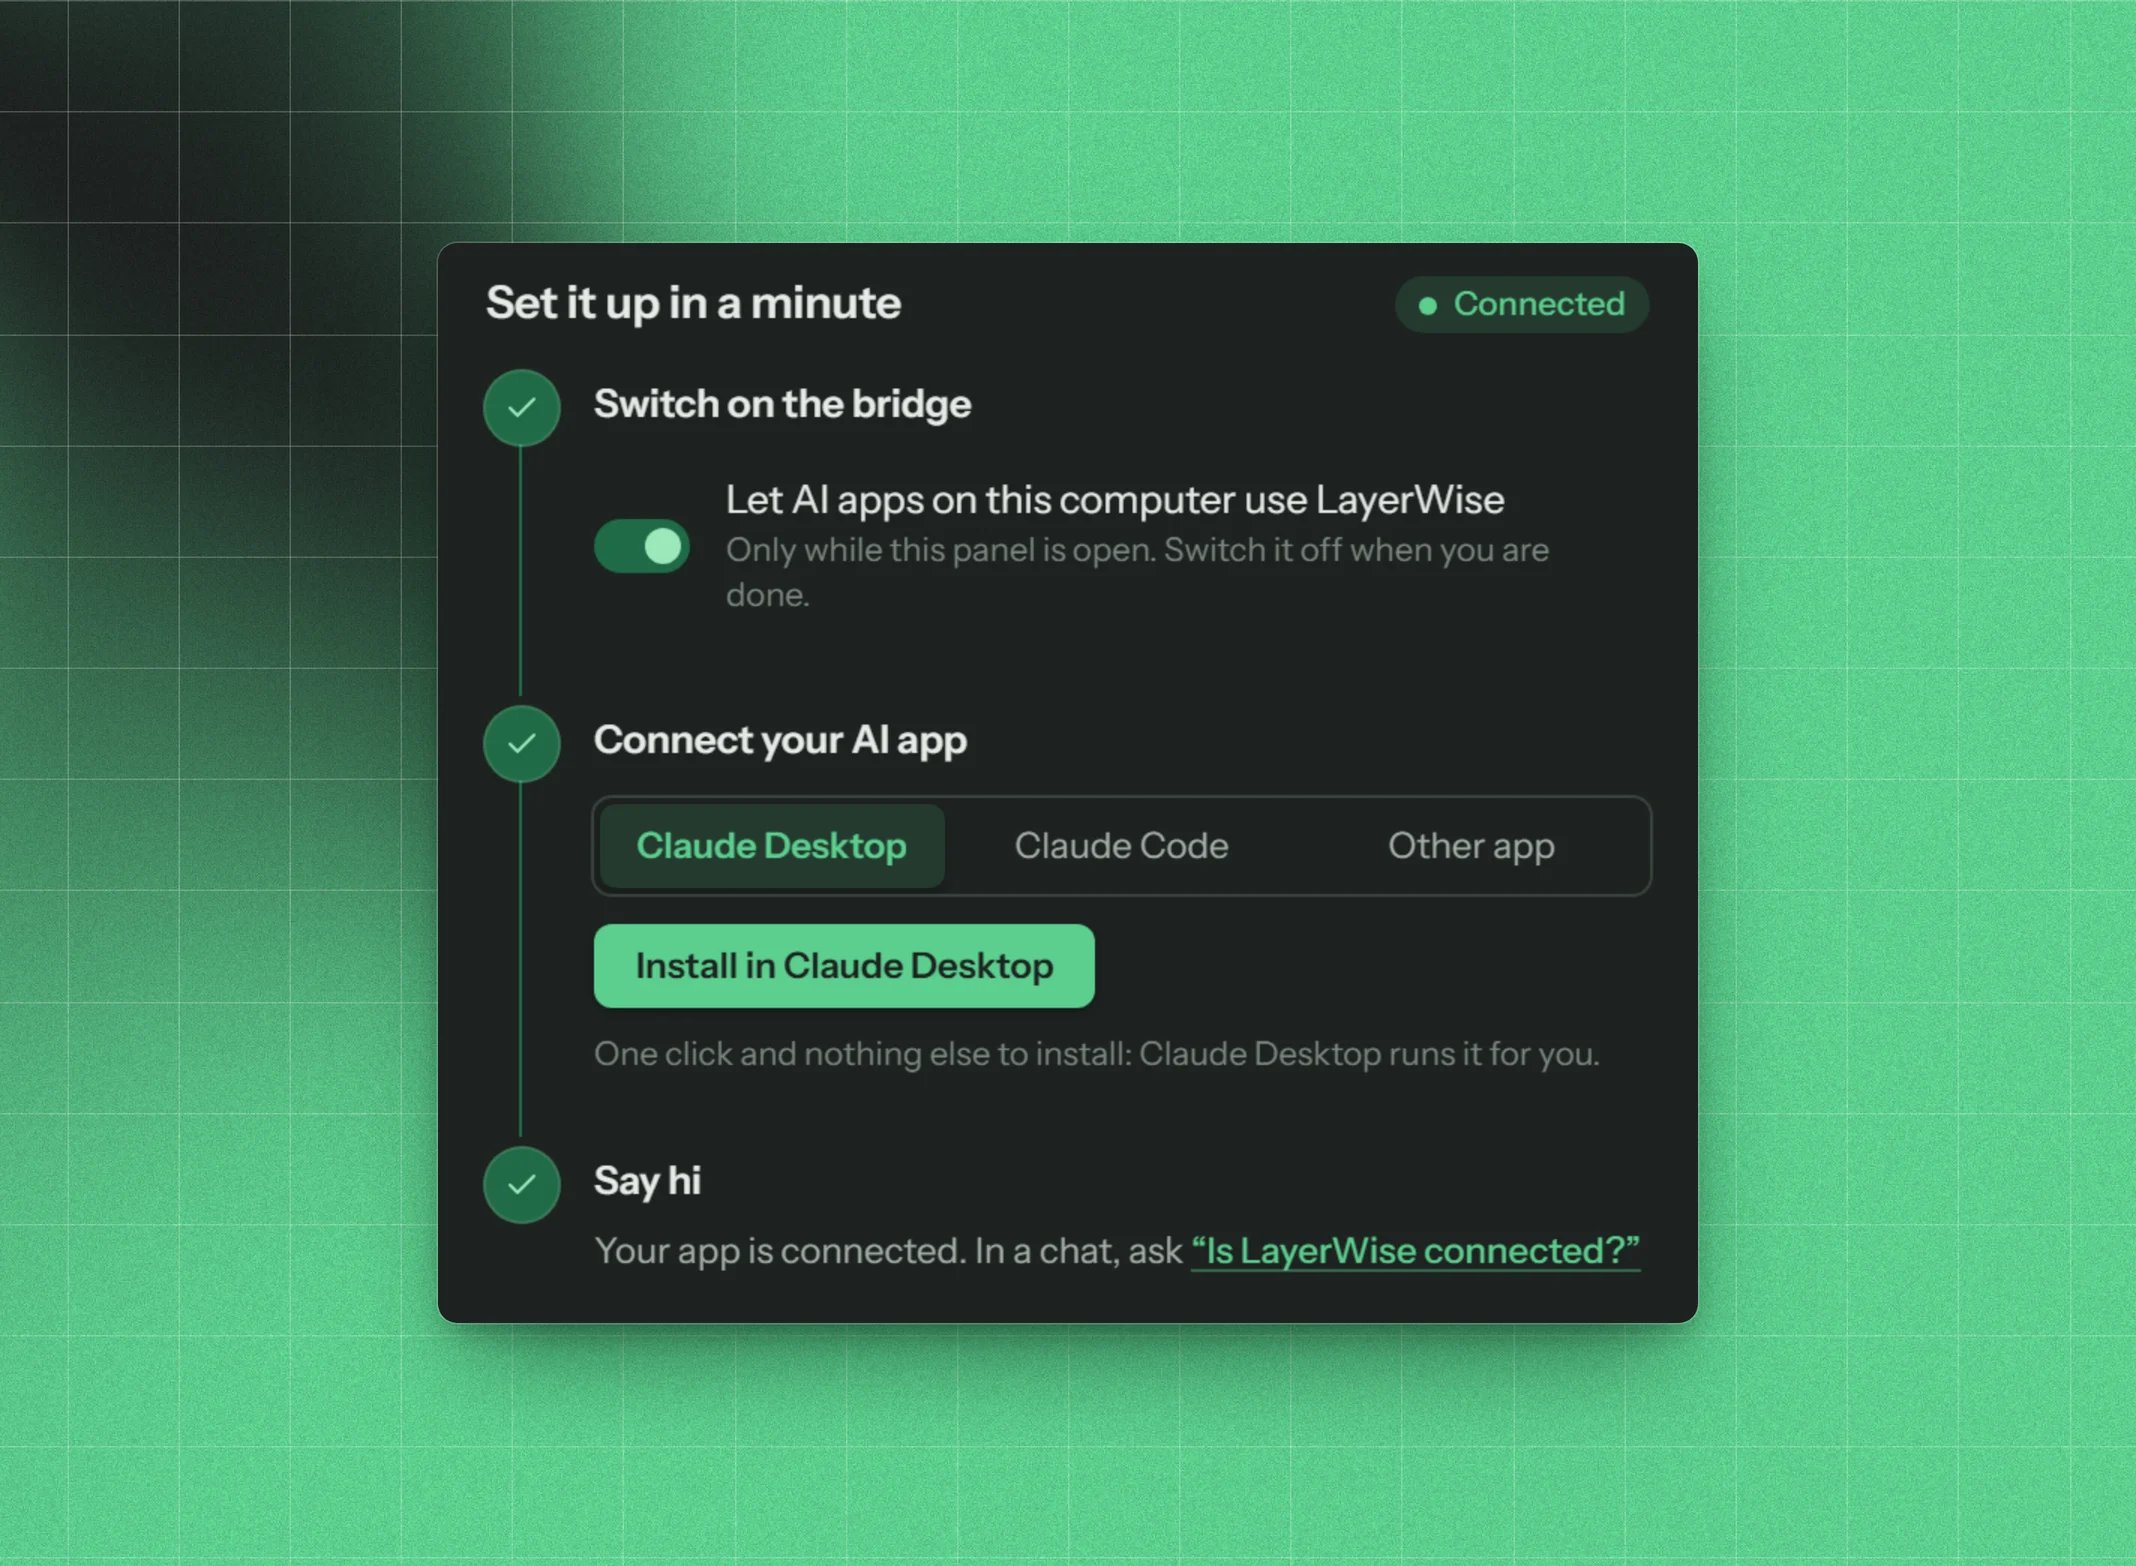
The AI assistant page: three steps that tick themselves
1
Switch on the bridge
Turn on Let AI apps on this computer use LayerWise. The bridge runs only while the LayerWise panel is open. Switch it off when you’re done.
2
Connect your AI app
Choose your app:
- Claude Desktop: press Install in Claude Desktop. Claude Desktop opens and installs the LayerWise extension. Confirm the install, then start a new chat. There’s nothing else to install.
- Claude Code: copy the command shown and paste it into a terminal once.
- Other app: copy the JSON shown and add it to the
mcpServerssection of your app’s settings.
3
Say hi
Ask your assistant “Is LayerWise connected? What can you do with it?”. The step ticks when the app connects, and the page shows Connected.
After upgrading to a new major Photoshop version, repeat step 2 for Claude Code and other apps. Claude Desktop keeps its own copy and keeps working.
What the assistant can do
- Read the document: find the render elements in the open PSD, read its structure as a template, select layers.
- Build from a folder: give it the path of a render folder and a template name, and it builds the document with the usual defaults. It can then save it as PSB or PSD wherever you say, for example right next to the renders. It never overwrites an existing file unless you ask it to.
- Run LayerWise jobs: create new documents, update renders, merge regions and run any of the tools, with the same undo steps as when you run them.
- See the image: get a preview of the document, or zoom into a region.
- Use Photoshop directly: add adjustment layers, rename or colour-label groups, and other Photoshop actions, each as one undo step.
- Work with image AI: send a crop of the image to an image AI service such as Pulze Project Dream and place the result back as a new layer.
Things to ask
- Which render elements are in this document?
- Build a new PSD from my favourite template with the renders I pick.
- Update the renders in this file and refresh the multimatte masks.
- Collapse every group and reset all layer transforms.
- Add a Curves adjustment layer above the Reflection pass.
- Colour-label every group that holds a light pass orange.
- Use Pulze Dream to add a person reading on the sofa.
- Create a document from the V-Ray renders in D:\renders\cam01 with my “Studio exterior” template, then save it as PSB next to the renders.
Image AI edits
When you ask for an AI edit such as adding a person or removing a lamp, the assistant:- looks at a preview to find the area,
- uploads only a crop around it straight to the upload link the image AI service gave it,
- asks that service for the edit,
- places the result back into Photoshop as a new layer, fitted exactly over the crop.
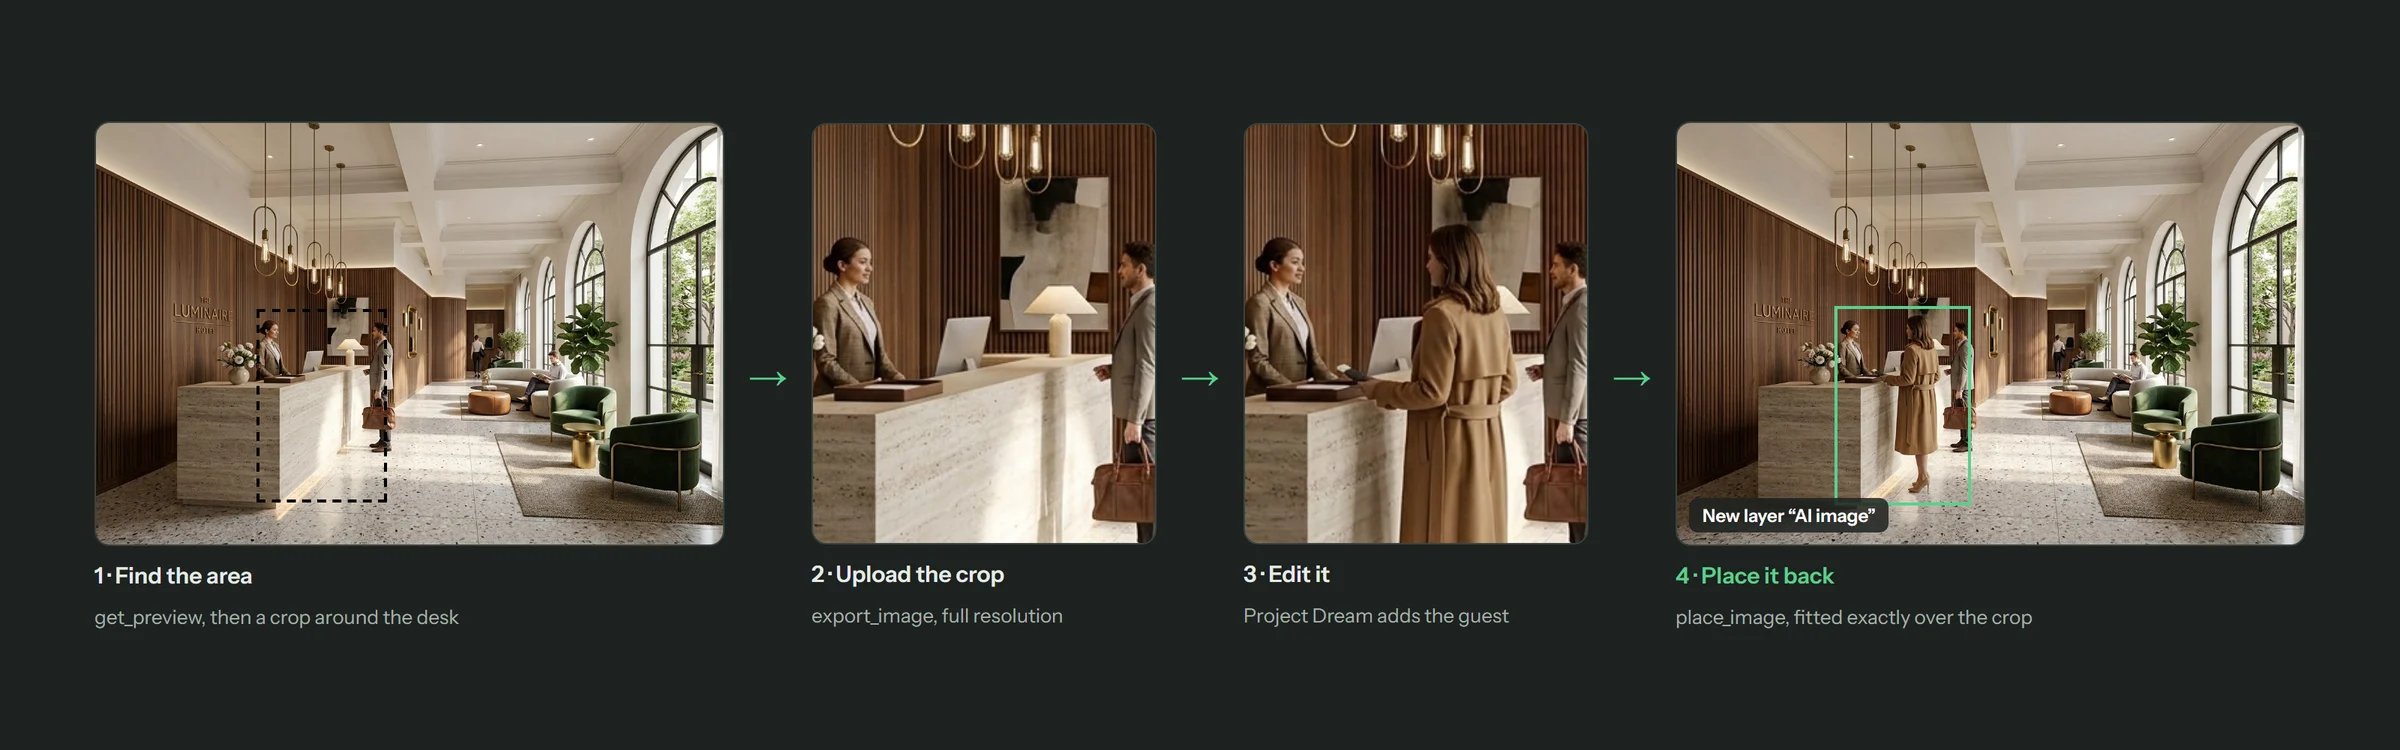
An image AI edit: crop out, edit, place back as a layer
Good to know
- Undo works. Everything the assistant does lands in the History panel. Ctrl+Z takes it back.
- You decide which files it uses. It reads a render folder only when you give it the path. Otherwise it opens the file picker in Photoshop and you choose the files.
- The bridge stays on your computer. LayerWise only talks to the AI app running on this machine. What your AI app does with the chat is up to that app.
- Security: while the bridge is on, any program on this computer can control Photoshop through LayerWise. That’s why it’s off by default. Switch it off when you’re not using it.
- You must be signed in to LayerWise for the assistant to work.
- The assistant can’t sign you in or out, change your settings, or open websites on its own.
Troubleshooting
The assistant says LayerWise isn't connected
The assistant says LayerWise isn't connected
Check that the LayerWise panel is open in Photoshop and the bridge is switched on. The AI assistant page shows the connection state and, if connecting failed, the last error. The panel retries every few seconds.
The bridge was taken over by another LayerWise
The bridge was taken over by another LayerWise
Only one LayerWise can be connected to your AI app at a time. If you have LayerWise open in a second Photoshop (another version, or on another account) with the AI assistant on, the newest one takes over, and the other panel says so and stops trying. To take the bridge back, switch the AI assistant off and on in that panel.
Install in Claude Desktop doesn't open anything
Install in Claude Desktop doesn't open anything
If Photoshop can’t open the extension file, the page shows its location instead. Double-click that file, or drag it into Claude Desktop’s Settings → Extensions.
Claude Code or another app can't start the server
Claude Code or another app can't start the server
Make sure Node.js 18 or newer is installed (
node --version in a terminal) and that the path in the command or JSON is the one shown on the page.