

1. Document
Open the PSD in Photoshop and press Update renders on Home. LayerWise finds every smart object whose name matches a render element of the selected engine.If you see No engine render elements in this document, check that the engine on Home matches the renderer the PSD was made with, and that the render layers are still smart objects named after their elements. See How it works → Smart objects.
2. Renders
You see the current document and its size. Press Browse folder or Pick files and choose the new renders, as in Create new document.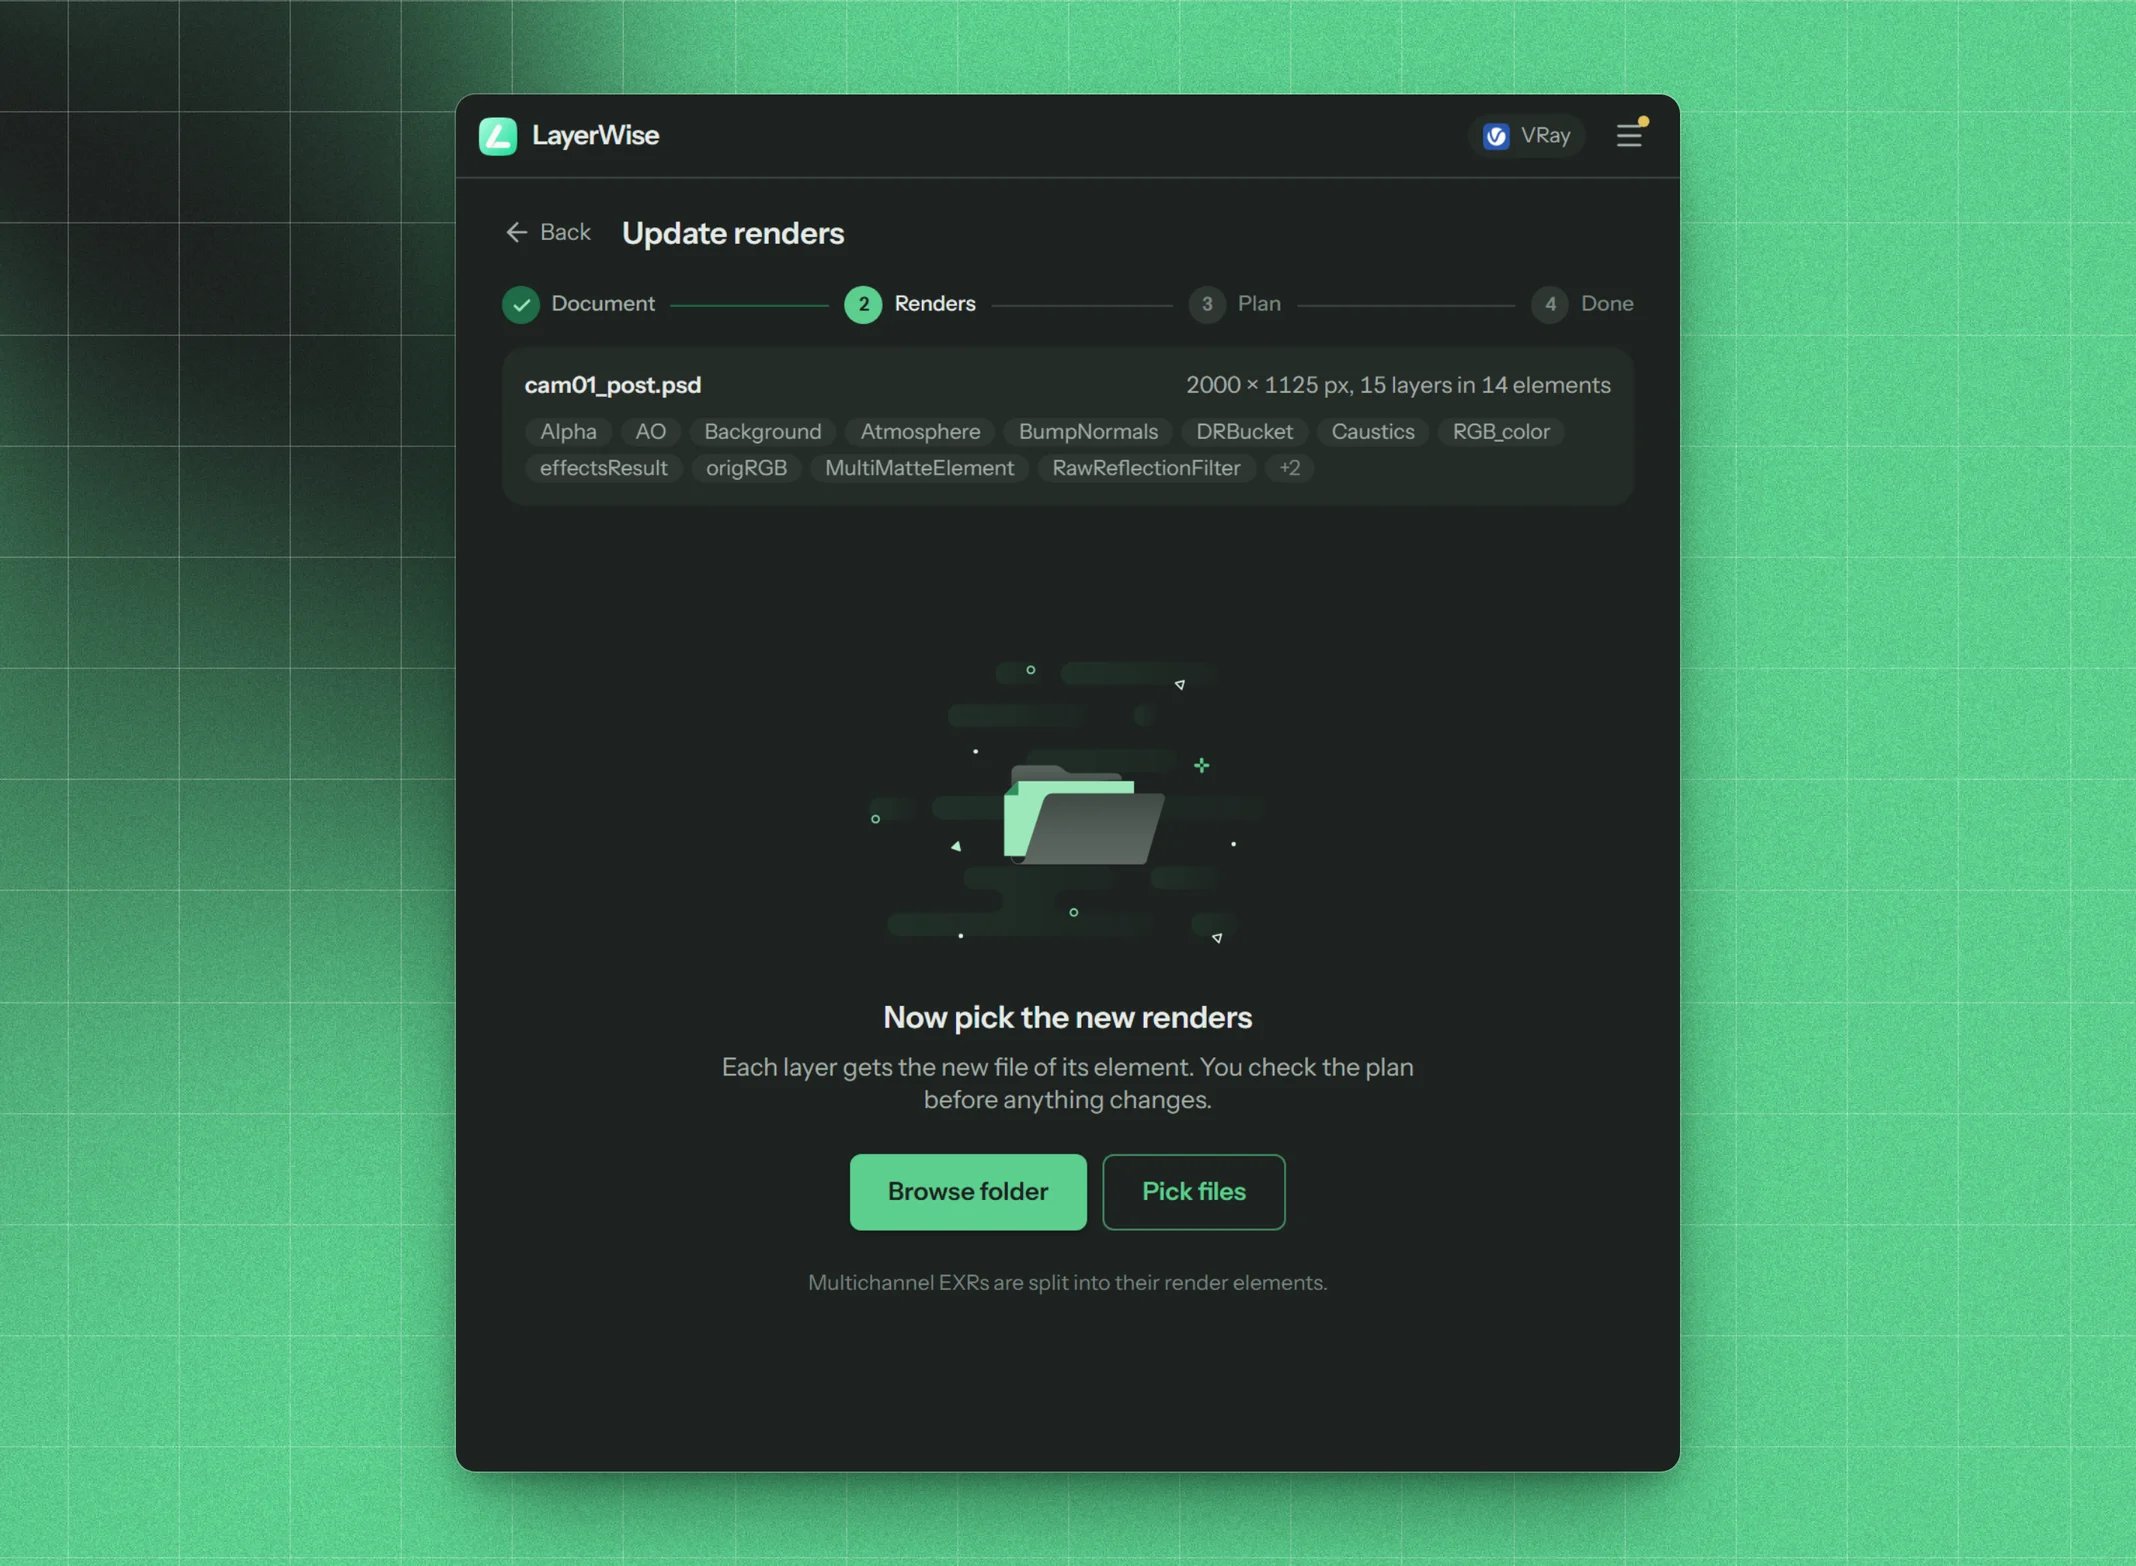
Step 2: the current document, and the new renders to bring in
3. Plan
LayerWise pairs every layer with a new file and shows you the plan before changing anything.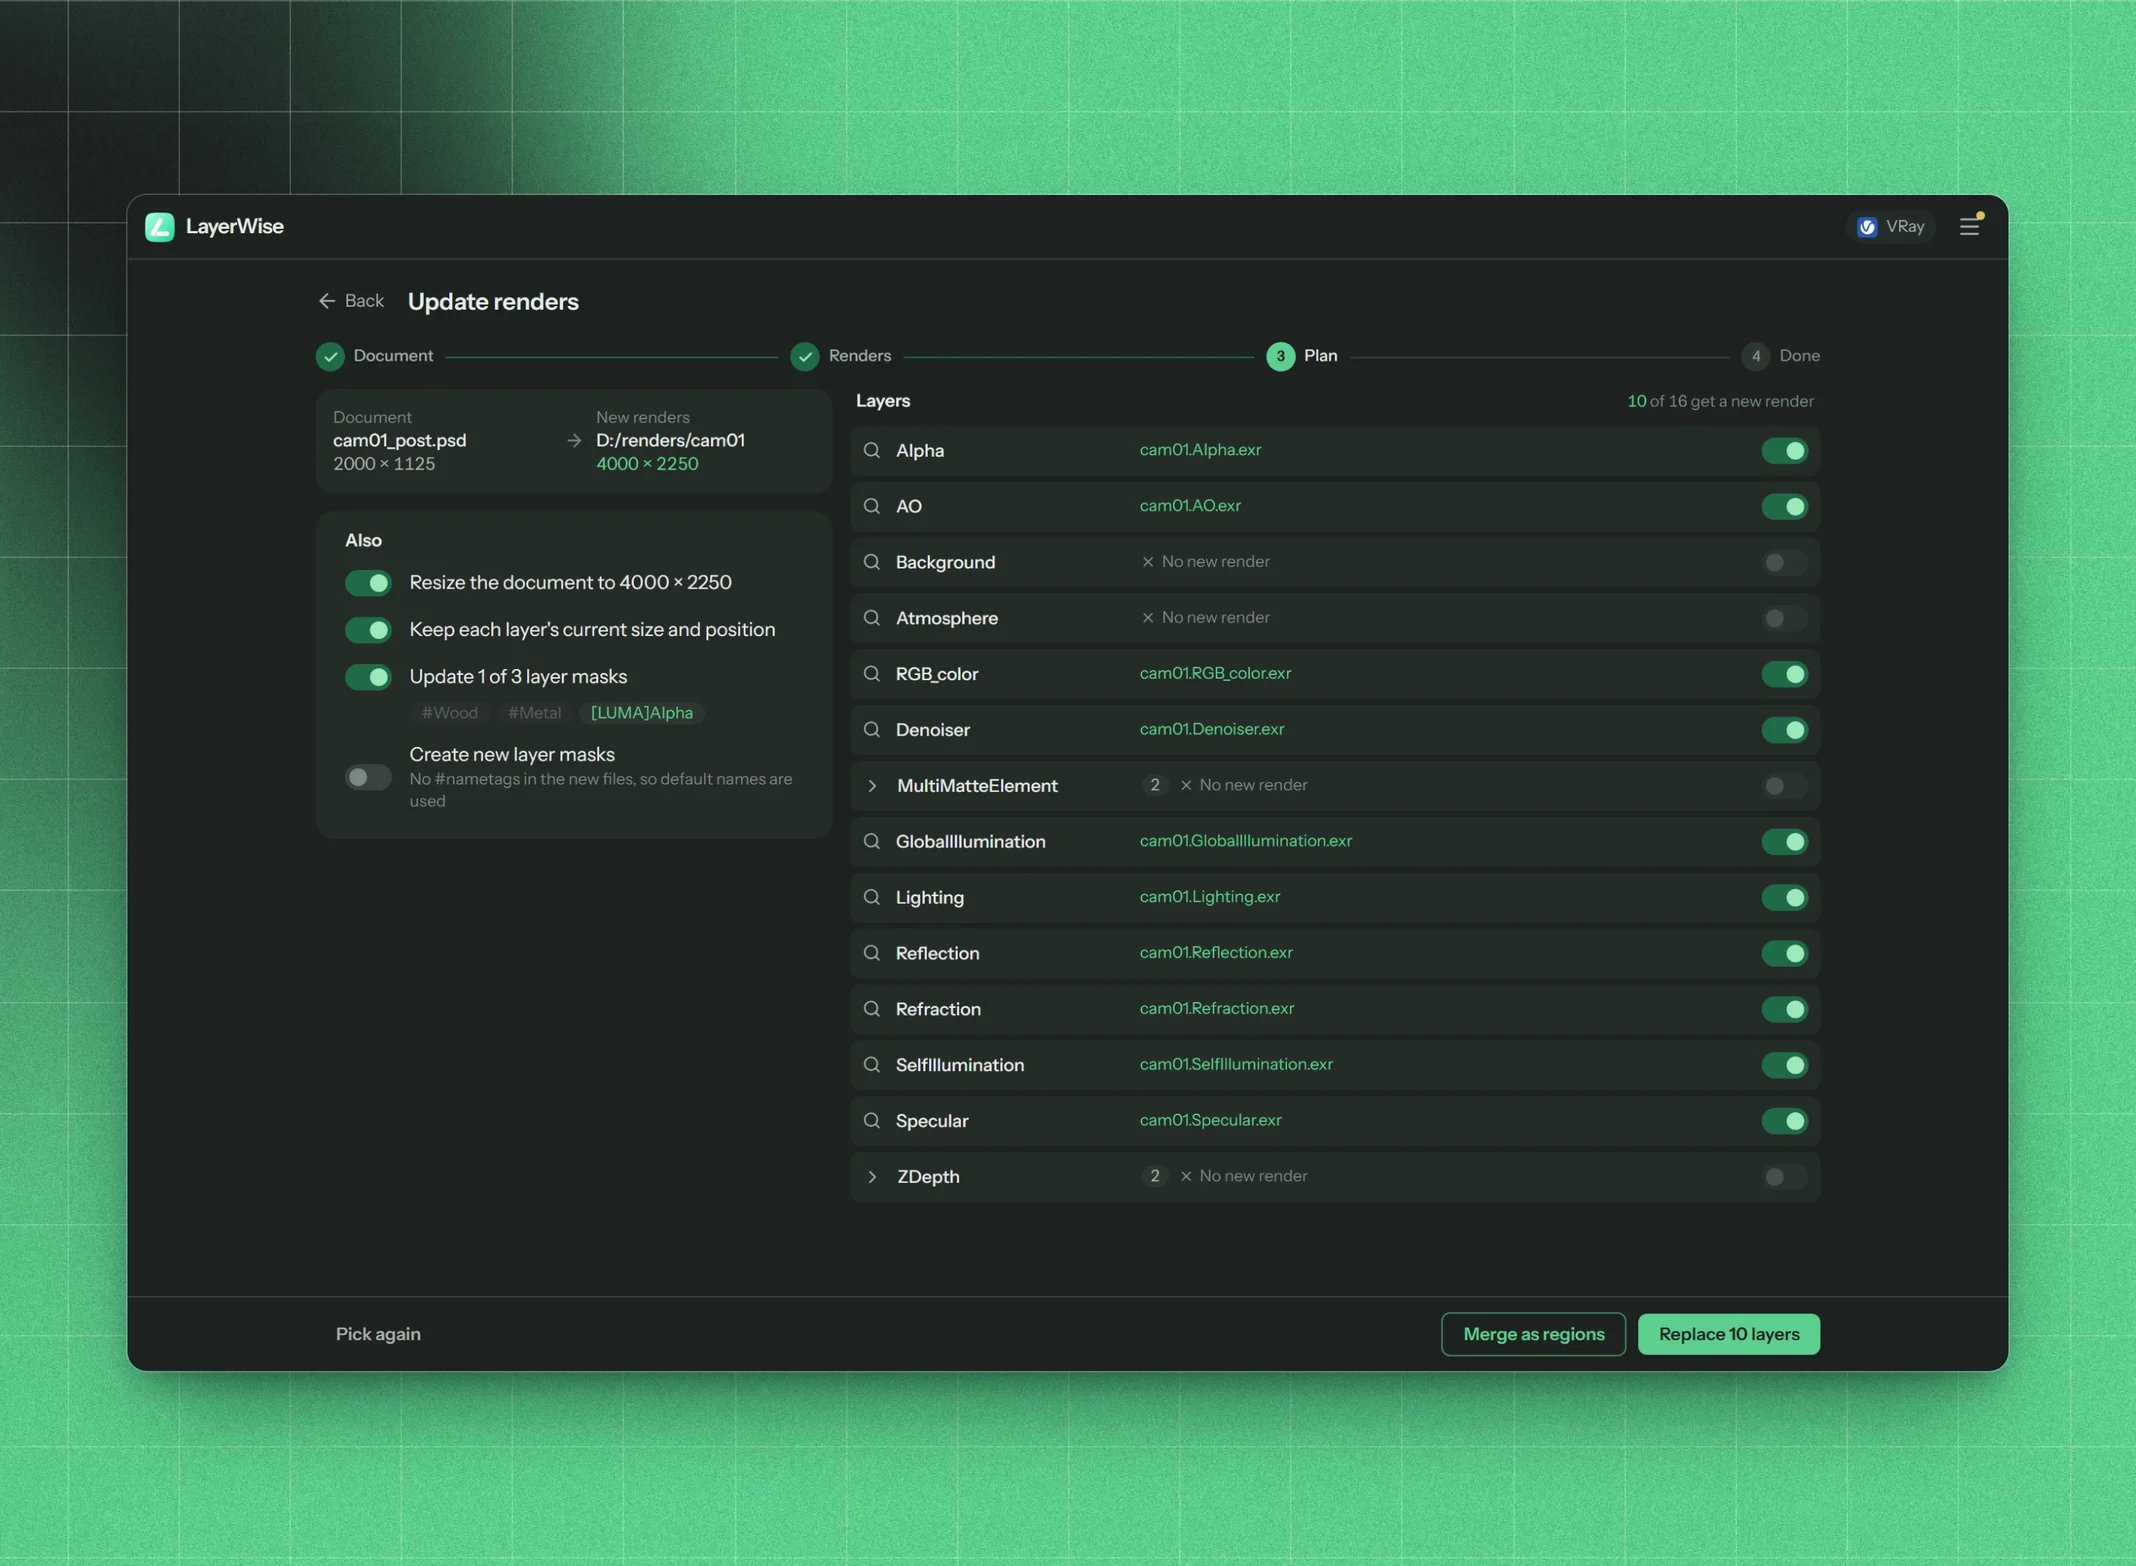
Step 3: each layer with its new file, and the options
Layers
One row per element found in the document:- The magnifier selects that layer in Photoshop, so you can see which one it is.
- The source shows the new file chosen for it. When several new files match, LayerWise picks the one whose name is closest to the layer’s name. You can choose another from the list.
- The switch turns the row on or off. Rows that are off are hatched and left untouched.
- Elements with several layers (such as LightSelect or ZDepth) show a count and a chevron. Expand them to set the file and switch for each layer.
Also
LayerWise presets these each time you pick renders, based on what it found. You can change them.Shown only when the new renders differ in size from the document, for example after rendering at a higher resolution. The document is resized after the layers are replaced. If the aspect ratio differs too, you get a warning: it still works, but keeping the same aspect ratio is strongly recommended.
Fits every new render into the rectangle the old layer covered on the canvas. It’s turned on automatically when the sizes differ, so a higher-resolution render lands exactly where the old one was. When the sizes match you rarely need it, typically only if you moved or scaled a render layer.The fit is non-destructive: the smart object keeps its full-resolution contents and is only scaled, so its scale may not read 100%. To bake it, use Reset layer transforms.
Regenerates the masks of existing mask targets (layers or groups named like
#Wood or [LUMA]Alpha) from the new multimatte and luma renders. The chips show every target in the document. Dimmed ones have no new mask source and are left as they are.Creates a new masked group for every nametag in the new multimattes that has no target in the document yet. If the new files have no nametags, default names (such as
MultiMatteElement_R) are used. See Masks.Shown when the new renders include a Cryptomatte. Mattes that already have a
#name group or layer in the document are picked and updated. Tick more to add new groups. See Cryptomatte.Buttons
- Pick again lets you choose different renders.
- Merge as regions merges region renders instead of replacing the layers. See Merge region renders.
- Replace render elements starts the job.
What happens
For every active row, as its own undo step (Replacing Reflection, …):- The smart object’s contents are replaced with the new file.
- The layer keeps its original name, instead of Photoshop renaming it to the new file’s name. (With Name created layers after the element in Settings, it’s named after the element instead.)
- If Keep each layer’s current size and position is on, the new contents are fitted to the old footprint.
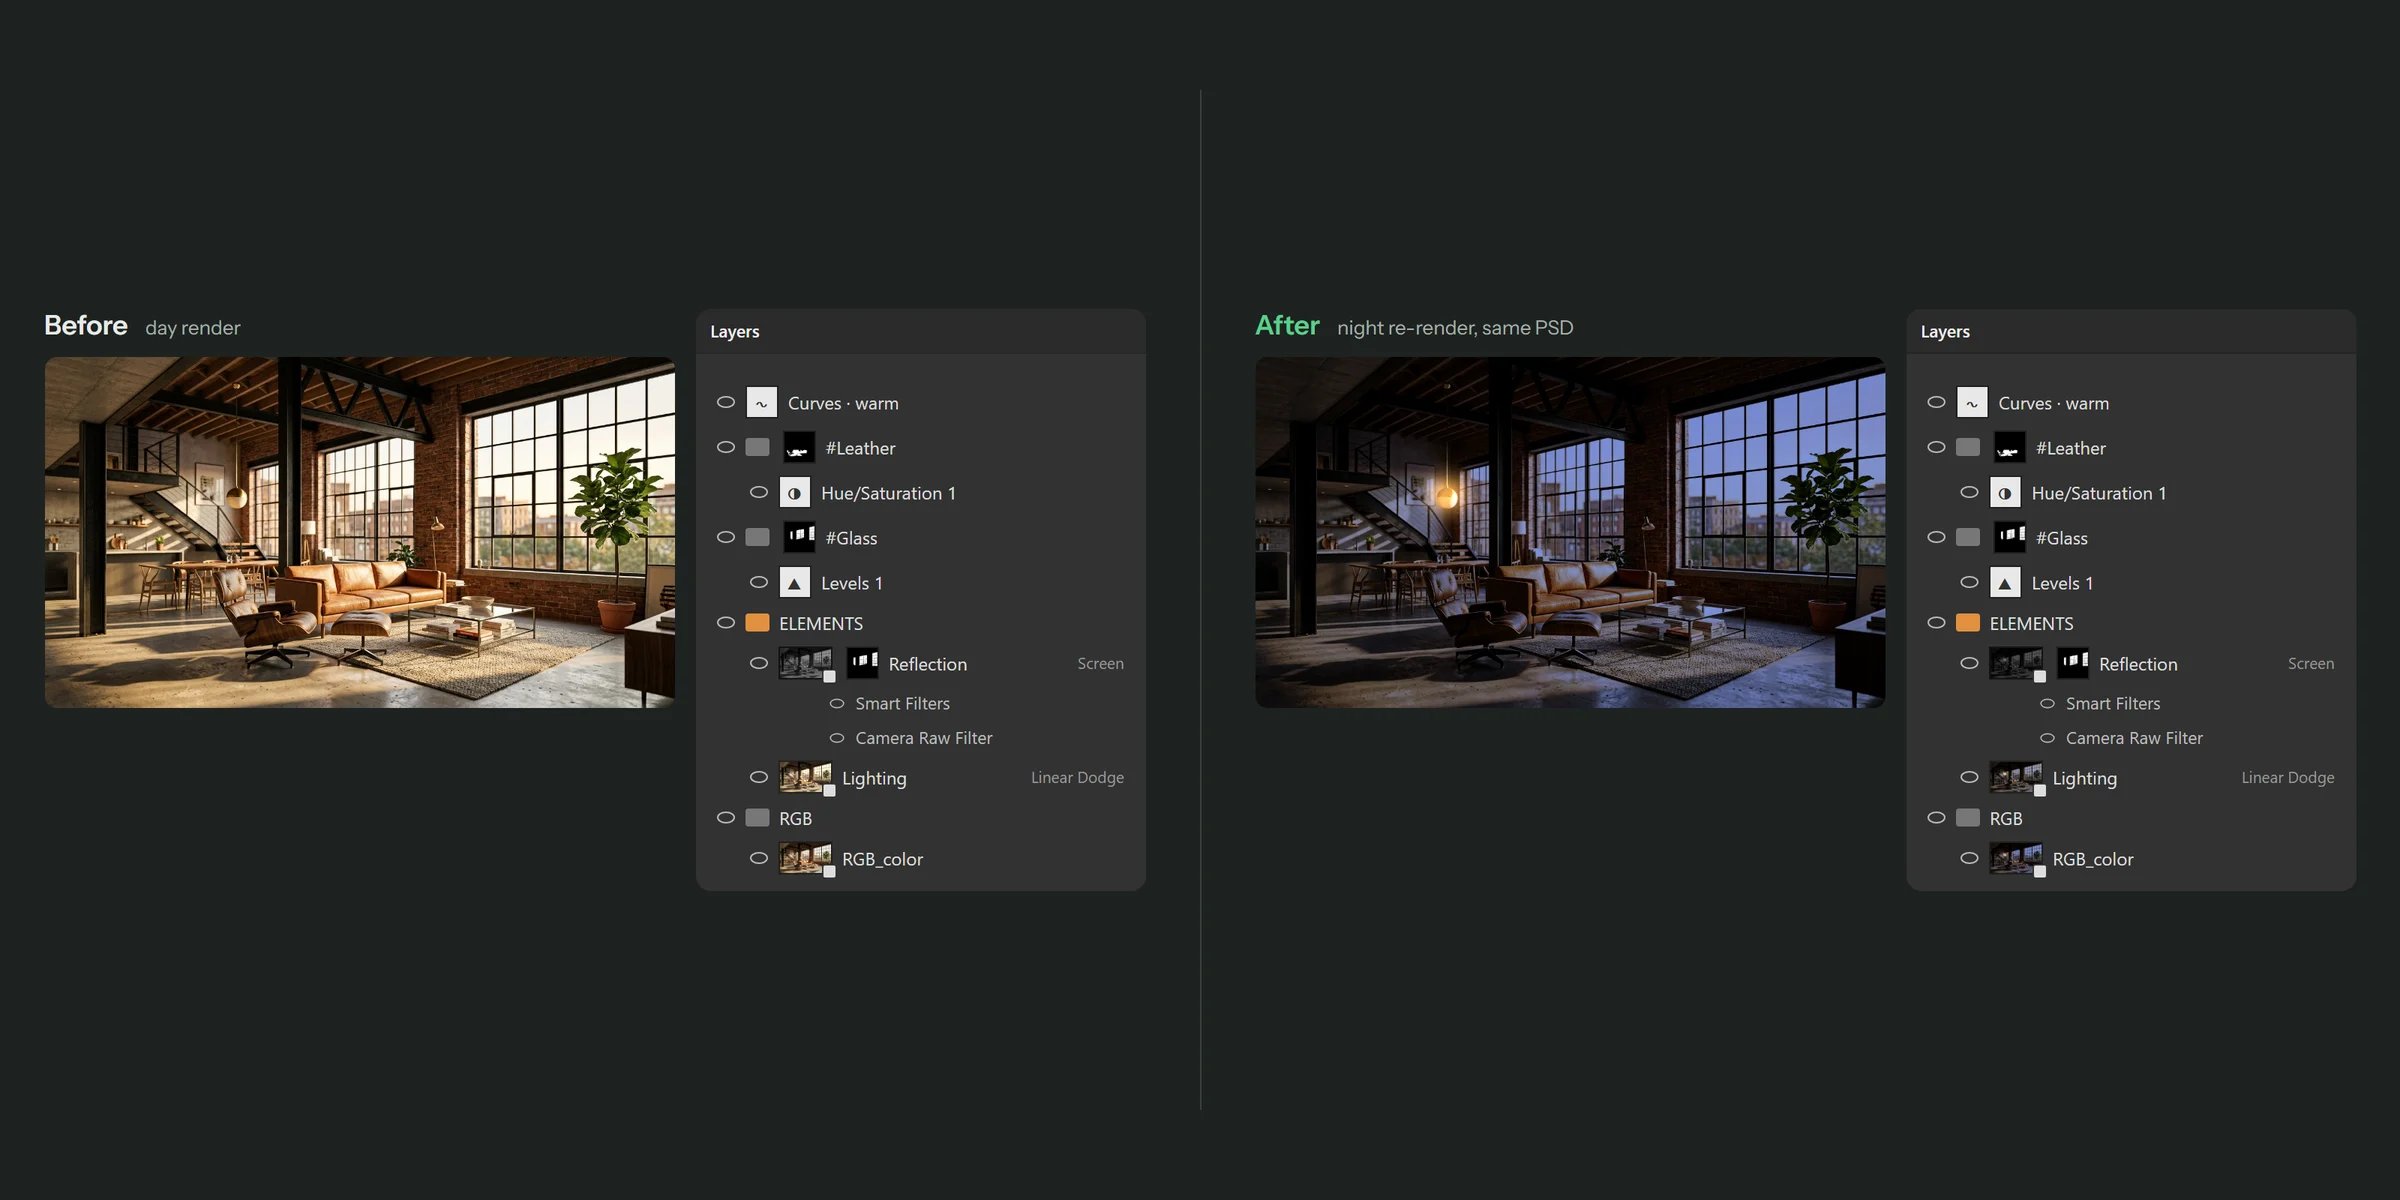
Same PSD, new renders: the adjustments, masks and filters are untouched
4. Done
Press Update again for another update, or Done to go Home. To undo the whole update, step back in the History panel.Tips
- Linked smart objects are relinked to the new files. Leave the new files where they are, or Photoshop will ask for them when you open the PSD.
- Documents made by hand work too, as long as the render layers are smart objects whose names contain the element names.
- Different renderer? If the document was built for another engine, switch the engine on Home and start again.