

- the pencil on one of your own templates edits it,
- Duplicate and edit on any template (including built-in and cloud ones) edits a copy.
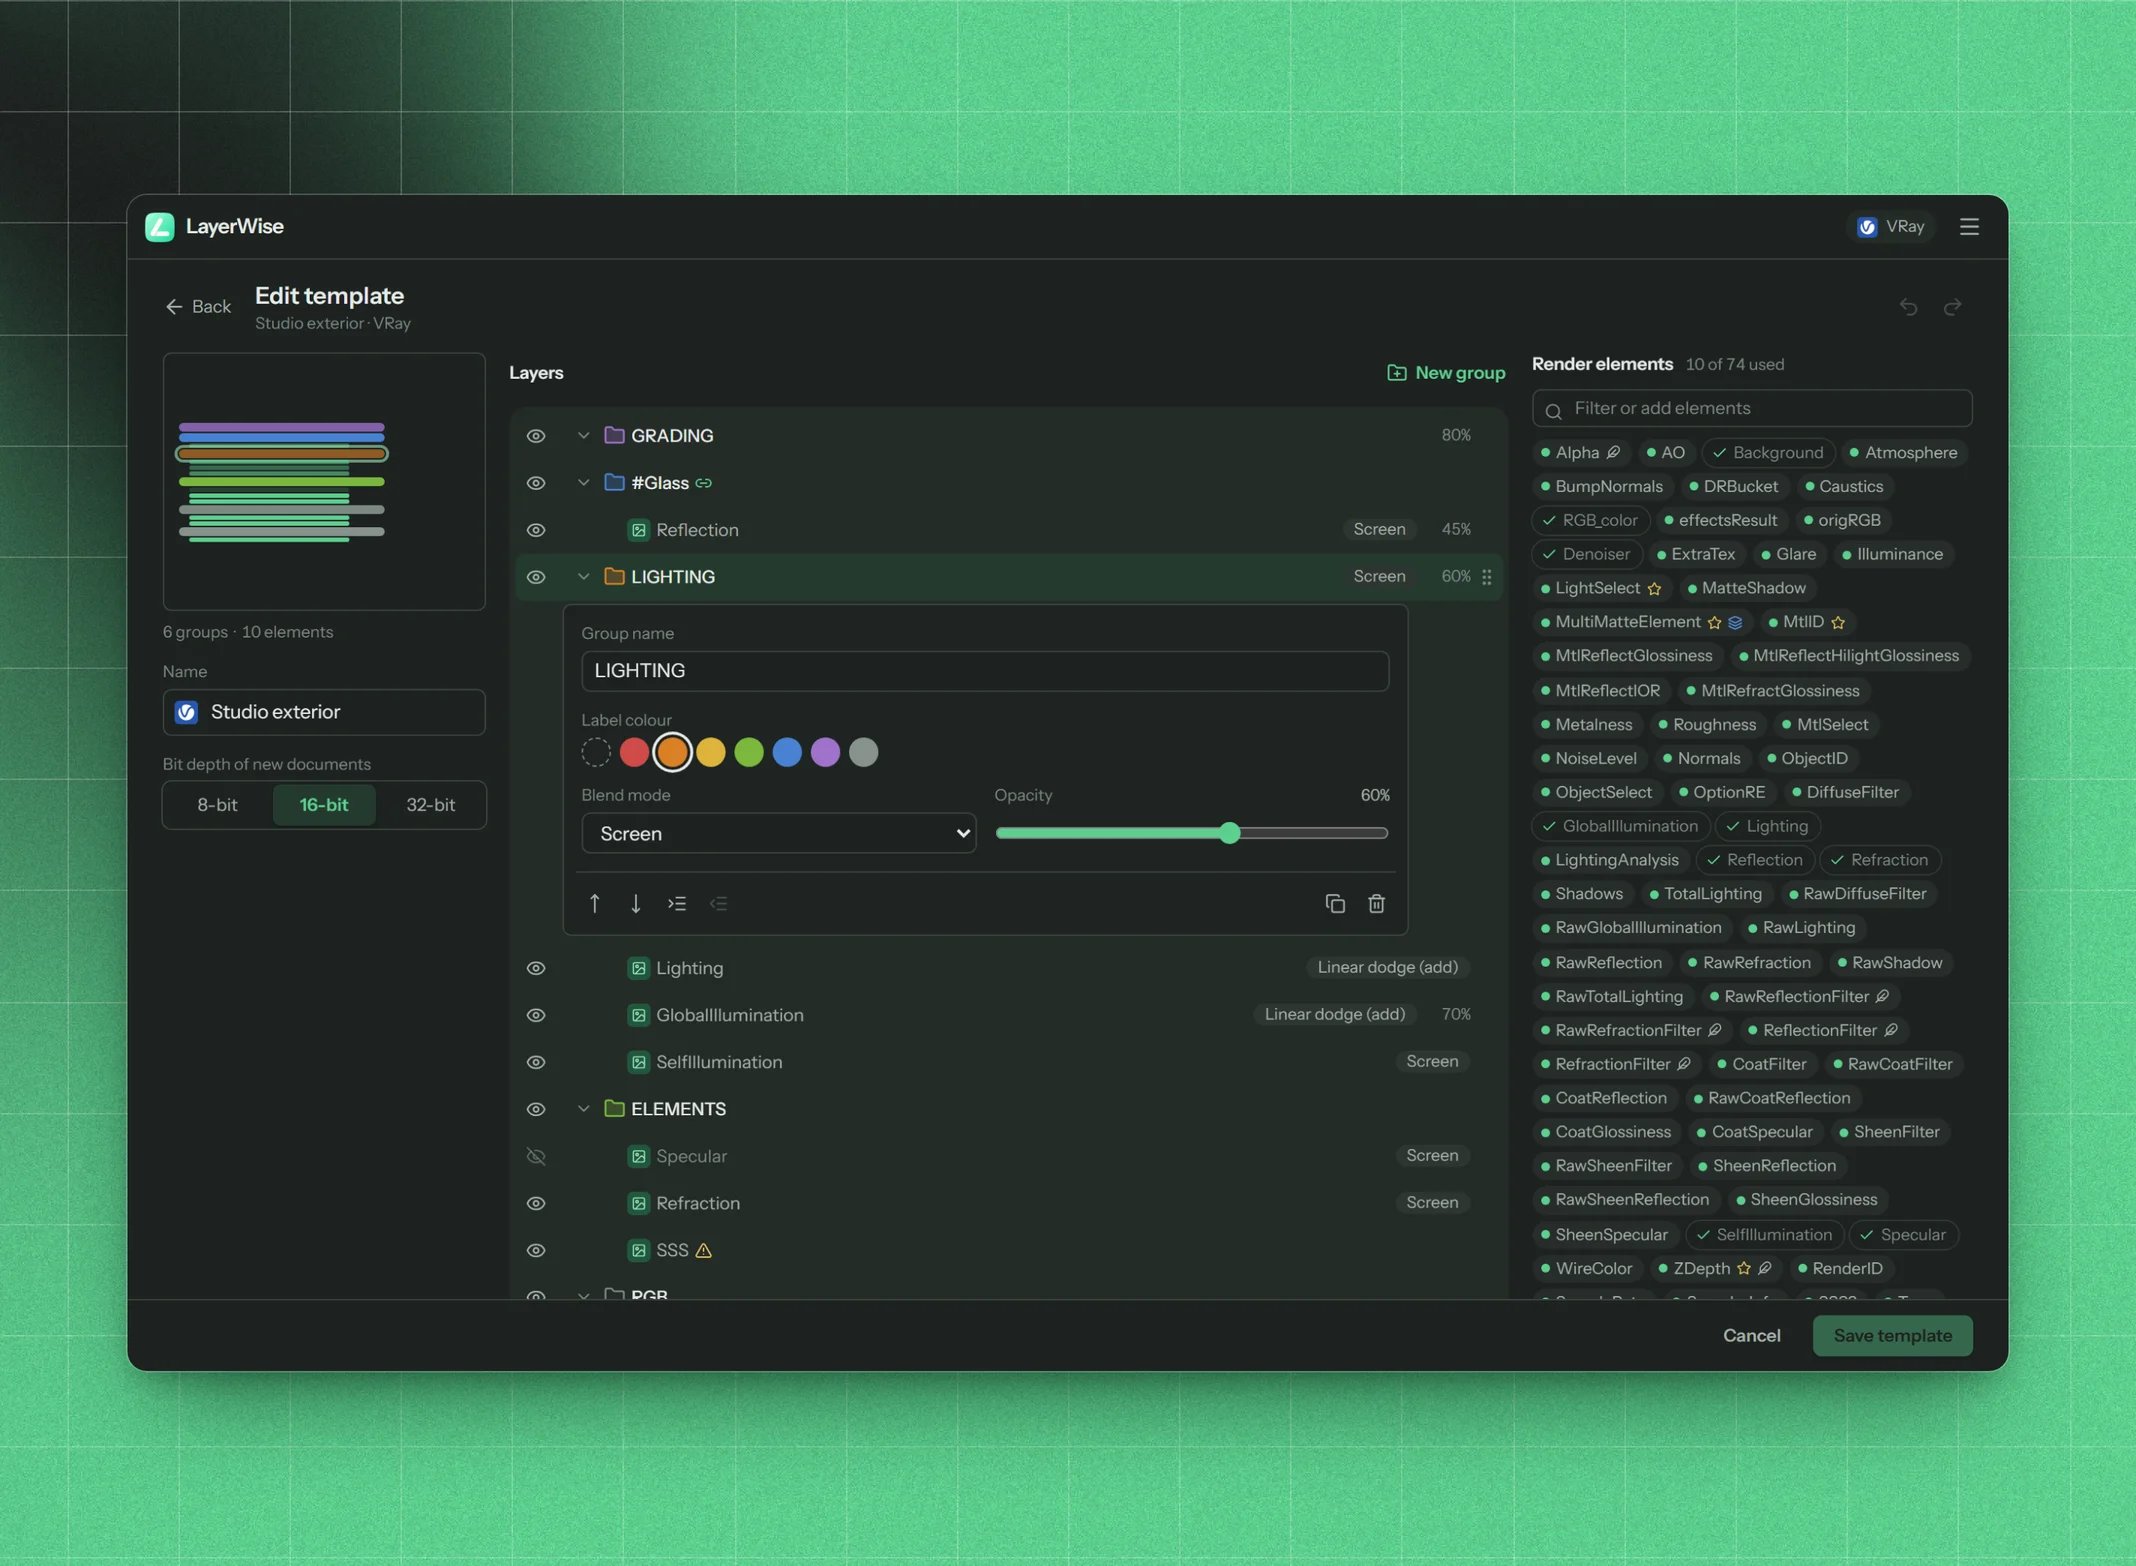
The template editor
- The stack (middle). The template from top to bottom, just like the Layers panel.
- Properties. Press a row to edit it in place, as with LIGHTING above.
- Render elements (right). The element palette of the template’s engine. Drag chips into the stack.
- Preview (top left). A live sketch of the structure: groups in their label colour, elements in green, dimmed when hidden or transparent. Click a plate to select its row.
Template settings
At the top: the template’s name and the bit depth of new documents (8, 16 or 32 bits) built from it.Groups and elements
Add a group and name it. Each group has:- Group name. Name a group like a mask (
#Wood,[LUMA]Alpha) to make it a mask target. It’s marked with a Mask target icon. - Label colour. Its colour in Photoshop’s Layers panel.
- Blend mode. Any Photoshop blend mode, including Pass Through.
- Opacity and visibility (the eye).
Arranging
- Drag rows to move them. Drop on the top part of a group to put the item above it, on the middle to put it inside, or on the bottom (of a collapsed group) to put it below.
- Or use the buttons: Move up, Move down, Move into the group above, Move out of this group, Duplicate and Delete.
- Collapse and expand groups with the chevron.
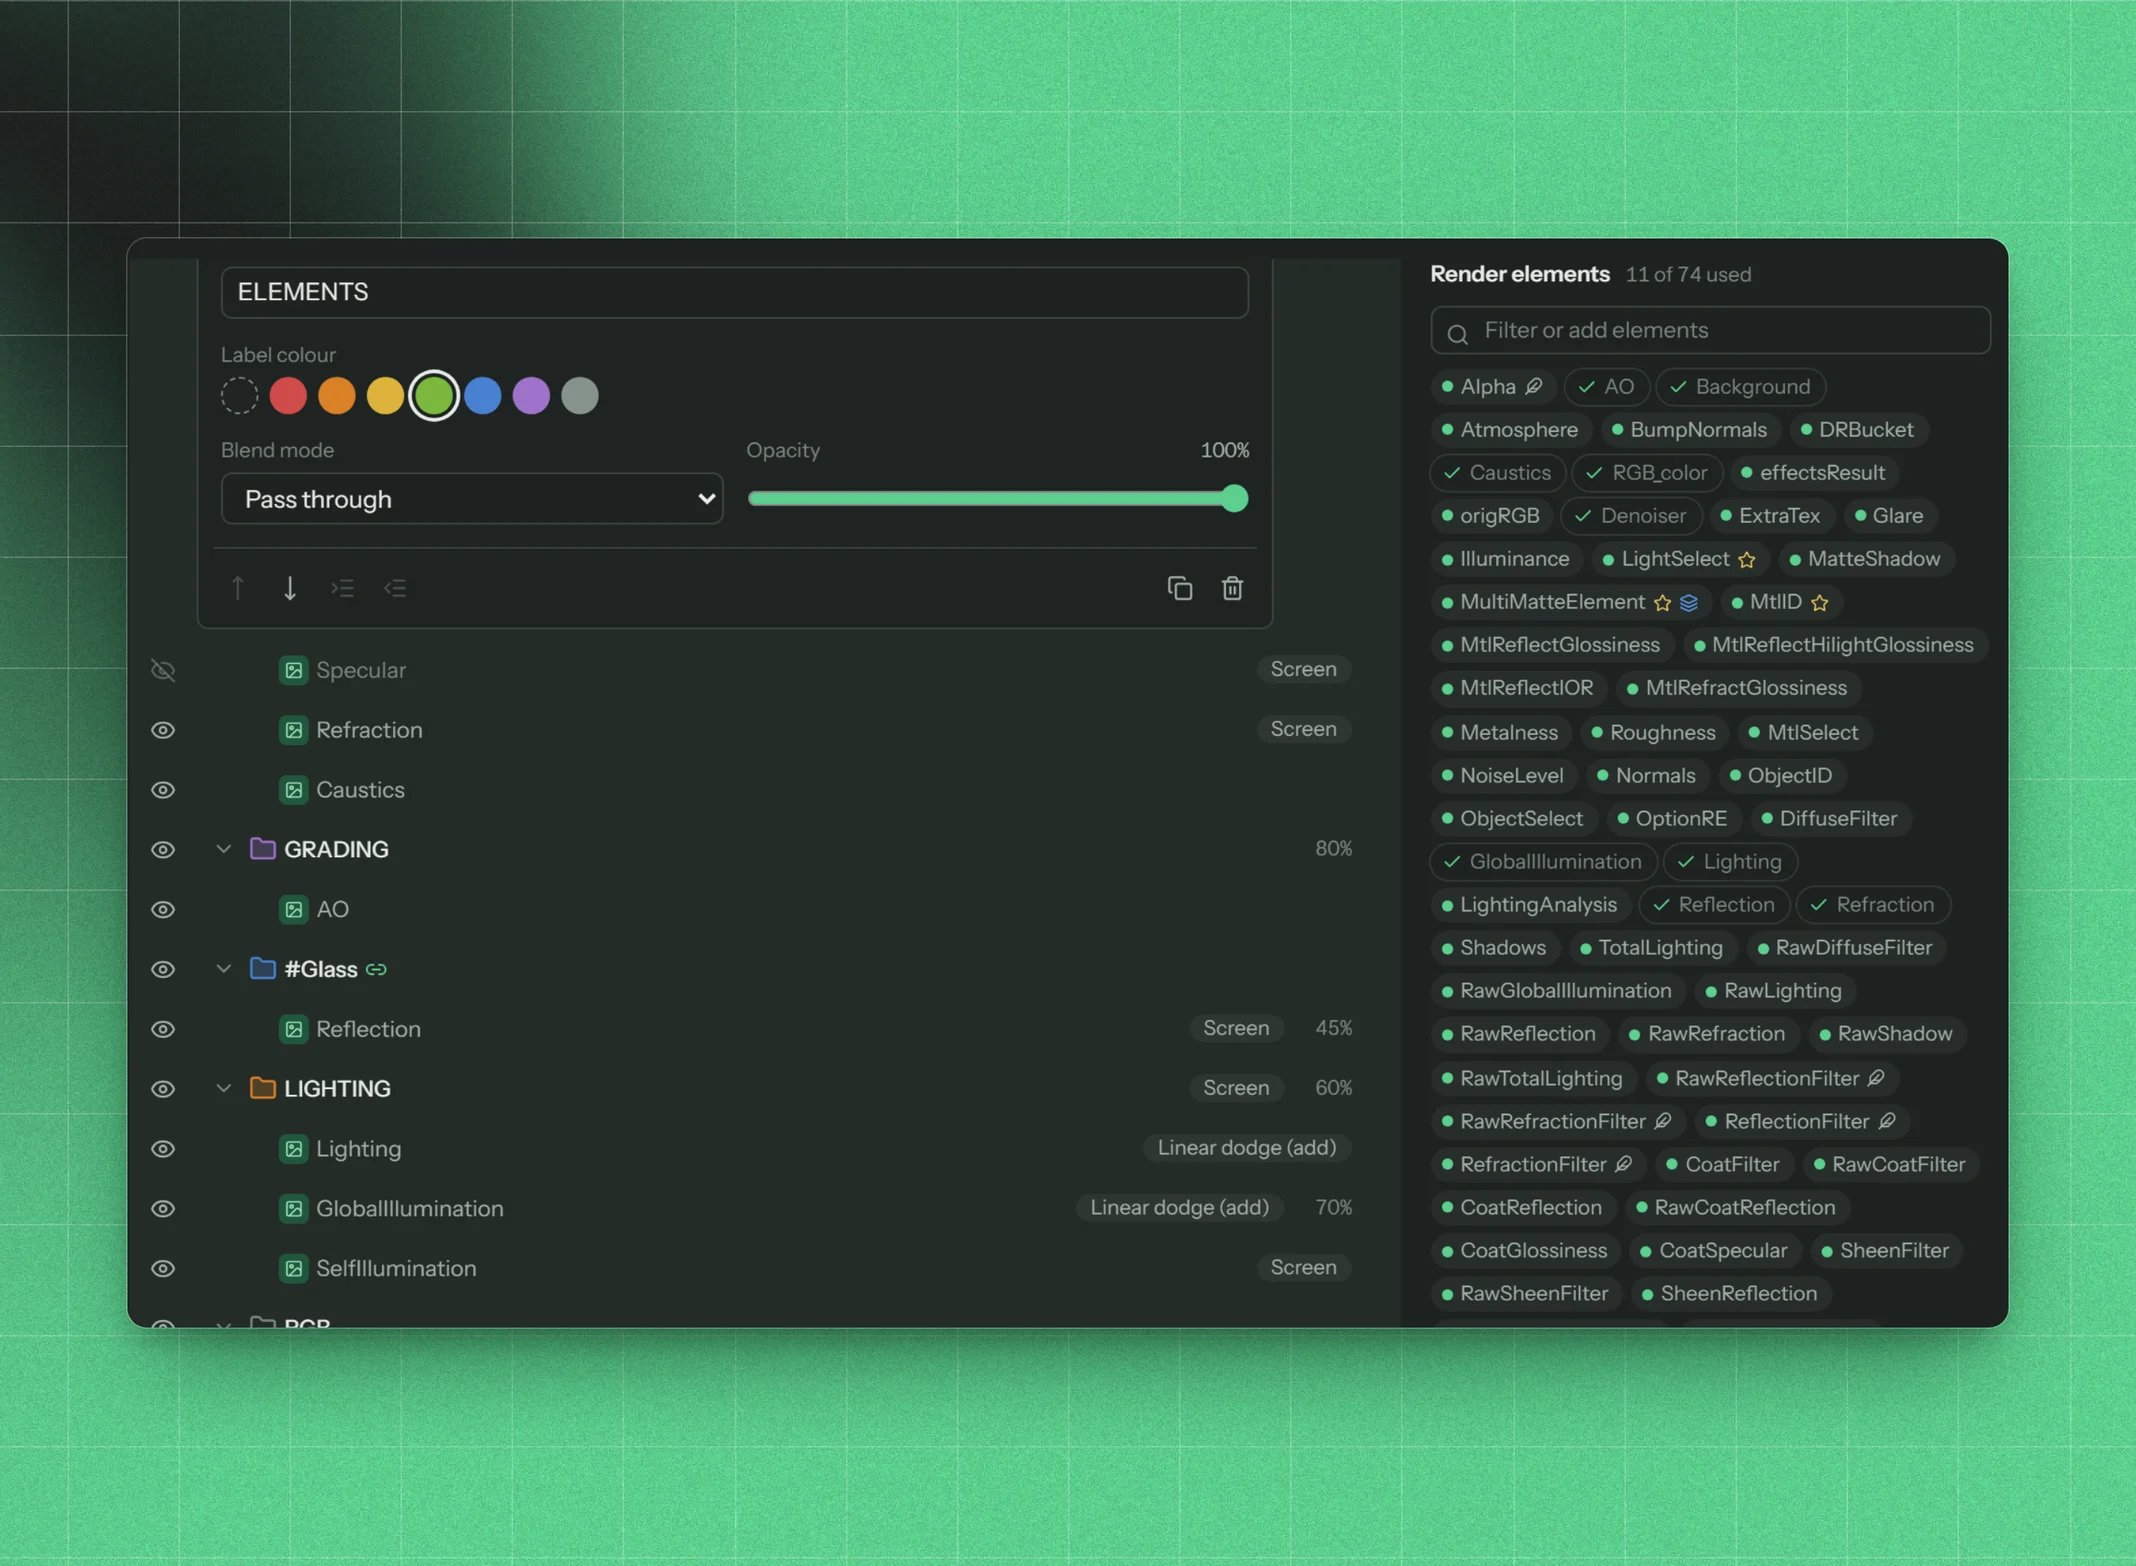
AO dragged from the palette into the GRADING group