

Before you start
- Select the right render engine on the Home screen.
- Render your elements as separate files or as a multichannel EXR. Keep each camera’s renders together in one folder.
1. Pick your renders
Press Create new document on Home, then choose:- Browse folder to pick your render output folder. LayerWise scans it and all its subfolders (skipping thumbnail folders) for PNG, JPEG, TIFF, TGA and EXR files.
- Pick files to choose individual files instead.
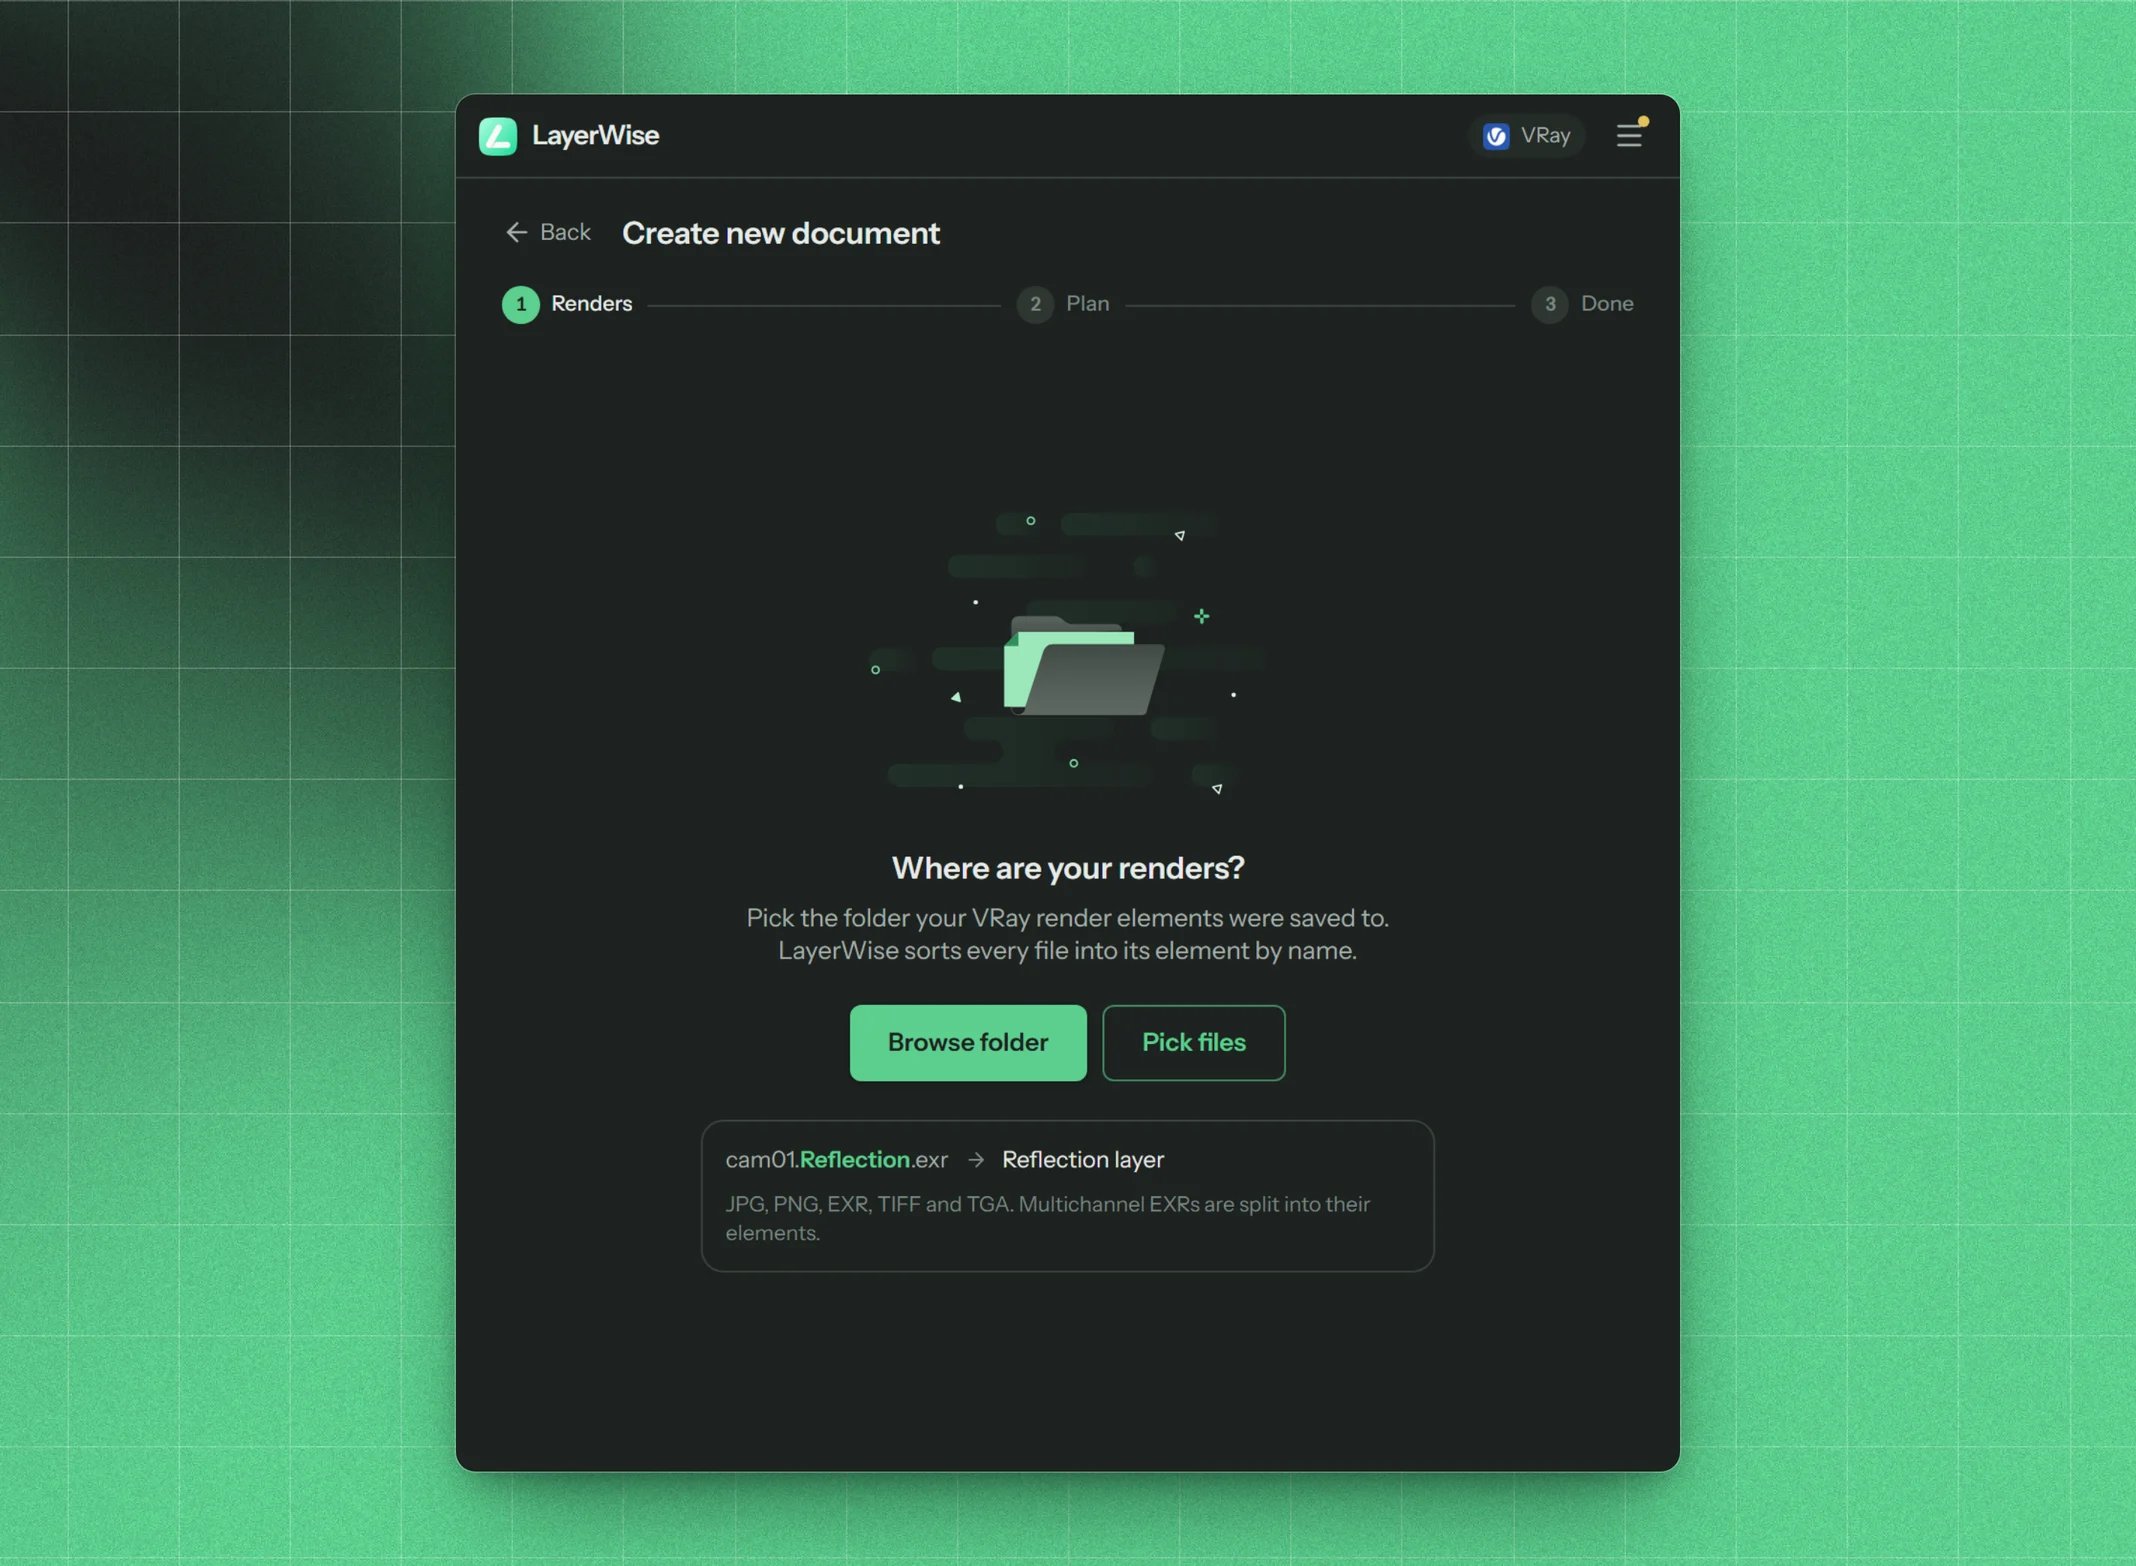
Step 1: point LayerWise at your render output
2. Check the plan
Here you see everything that will be built, before anything happens in Photoshop.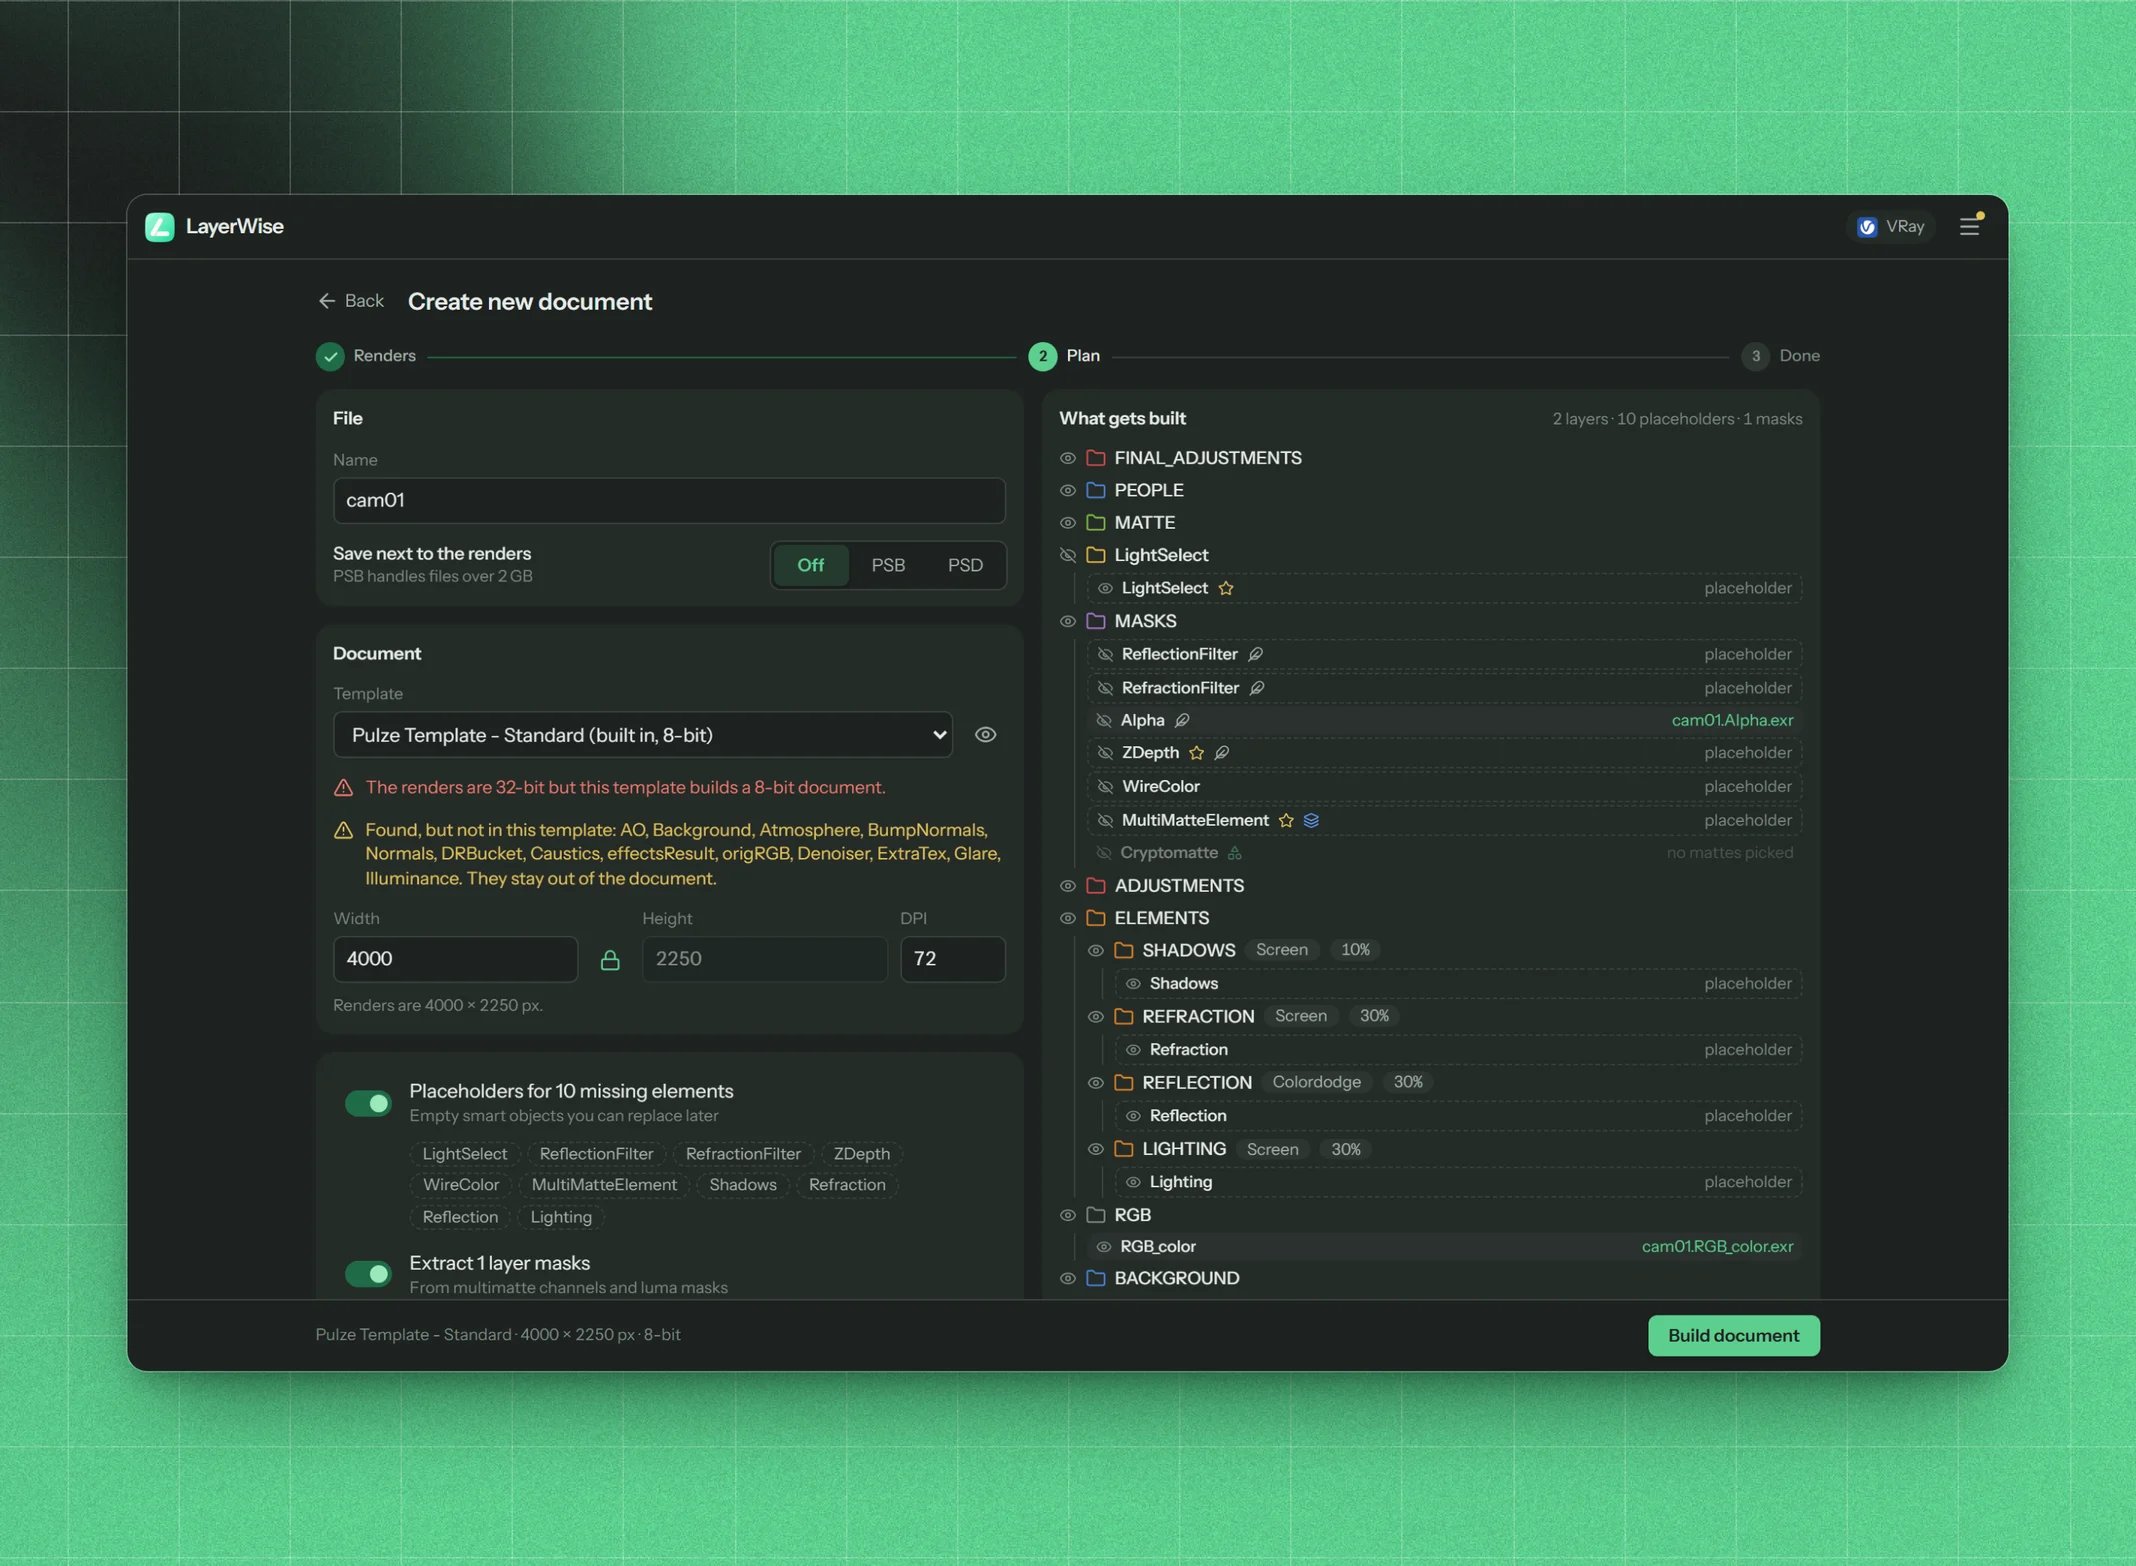
Step 2, Plan: check the name, saving, template, size and what gets built
File
- Name. The beauty pass file name up to the first dot (RGB_color for V-Ray, Beauty for Corona and FStorm). You can change it.
- Save next to the renders. Off (the default), PSB or PSD. With PSB or PSD, LayerWise saves the finished document into the render folder under its name. It never replaces an existing file; it adds a number instead (
cam01 2.psb). Pick PSB for files over 2 GB. LayerWise remembers your choice.
Document
- Template. The templates of the current engine, with your default template first, then your own and cloud templates, then the built-in ones. The chip shows the template’s bit depth and turns red if it differs from your renders’ bit depth (for example an 8-bit template with 32-bit EXRs).
- Inspect template (the eye) shows the template’s full layer tree.
Render output
- Width × Height. Defaults to the largest render size. If you change it, the document is resized after the renders are placed. With the aspect ratio locked (the default), the height follows the width.
- DPI. Defaults to the renders’ resolution, or 72 if they don’t store one. Changing it only changes the document’s DPI setting, not its pixels.
What gets built
- Elements found. Every template element with a matching render. When several files match one element, LayerWise uses the last one by default. Use Show every match to choose a different file per element. Elements marked Import all (such as LightSelect) bring in every matching file.
- Which file is the Beauty pass? Corona and FStorm beauty passes often have no element name in them (for example just
cam01.png). If the template needs a Beauty and none was matched, LayerWise asks you to pick it from the files that matched nothing. - Placeholders for N missing elements. Puts an empty smart object in the slot of every template element you didn’t render. The structure stays complete, and you can fill them later with Update renders.
- Extract N layer masks. Makes masks from your multimatte and luma passes. The chips show every mask that will be made, such as
#Woodfrom a multimatte’s nametags or[LUMA]Alphafrom the Alpha pass. The toggle is disabled when your renders have no multimatte or luma elements. See Masks. - Cryptomatte masks. Shown when your renders include a Cryptomatte. Pick the objects or materials you want masks for, from a list or straight in the image. See Cryptomatte.
What LayerWise builds
- A new document at your renders’ size and the template’s bit depth.
- The template’s groups, top to bottom, each with its name, label colour, blend mode, opacity and visibility.
- Every render placed as a smart object inside its group, at its native size, with the slot’s blend mode and opacity. Multimatte and wire colour layers are hidden, since they only serve as mask sources.
- Masks on the matching groups (created where needed), also saved as alpha channels. Picked Cryptomatte mattes become
#namegroups in the template’s Cryptomatte slot. - The document resized to your width, height and DPI, if you changed them.
- Every smart object baked so its scale reads 100%, if Layer transforms in new documents is set to Reset to 100%.
- The document saved as PSB or PSD in the render folder, if Save next to the renders is on.
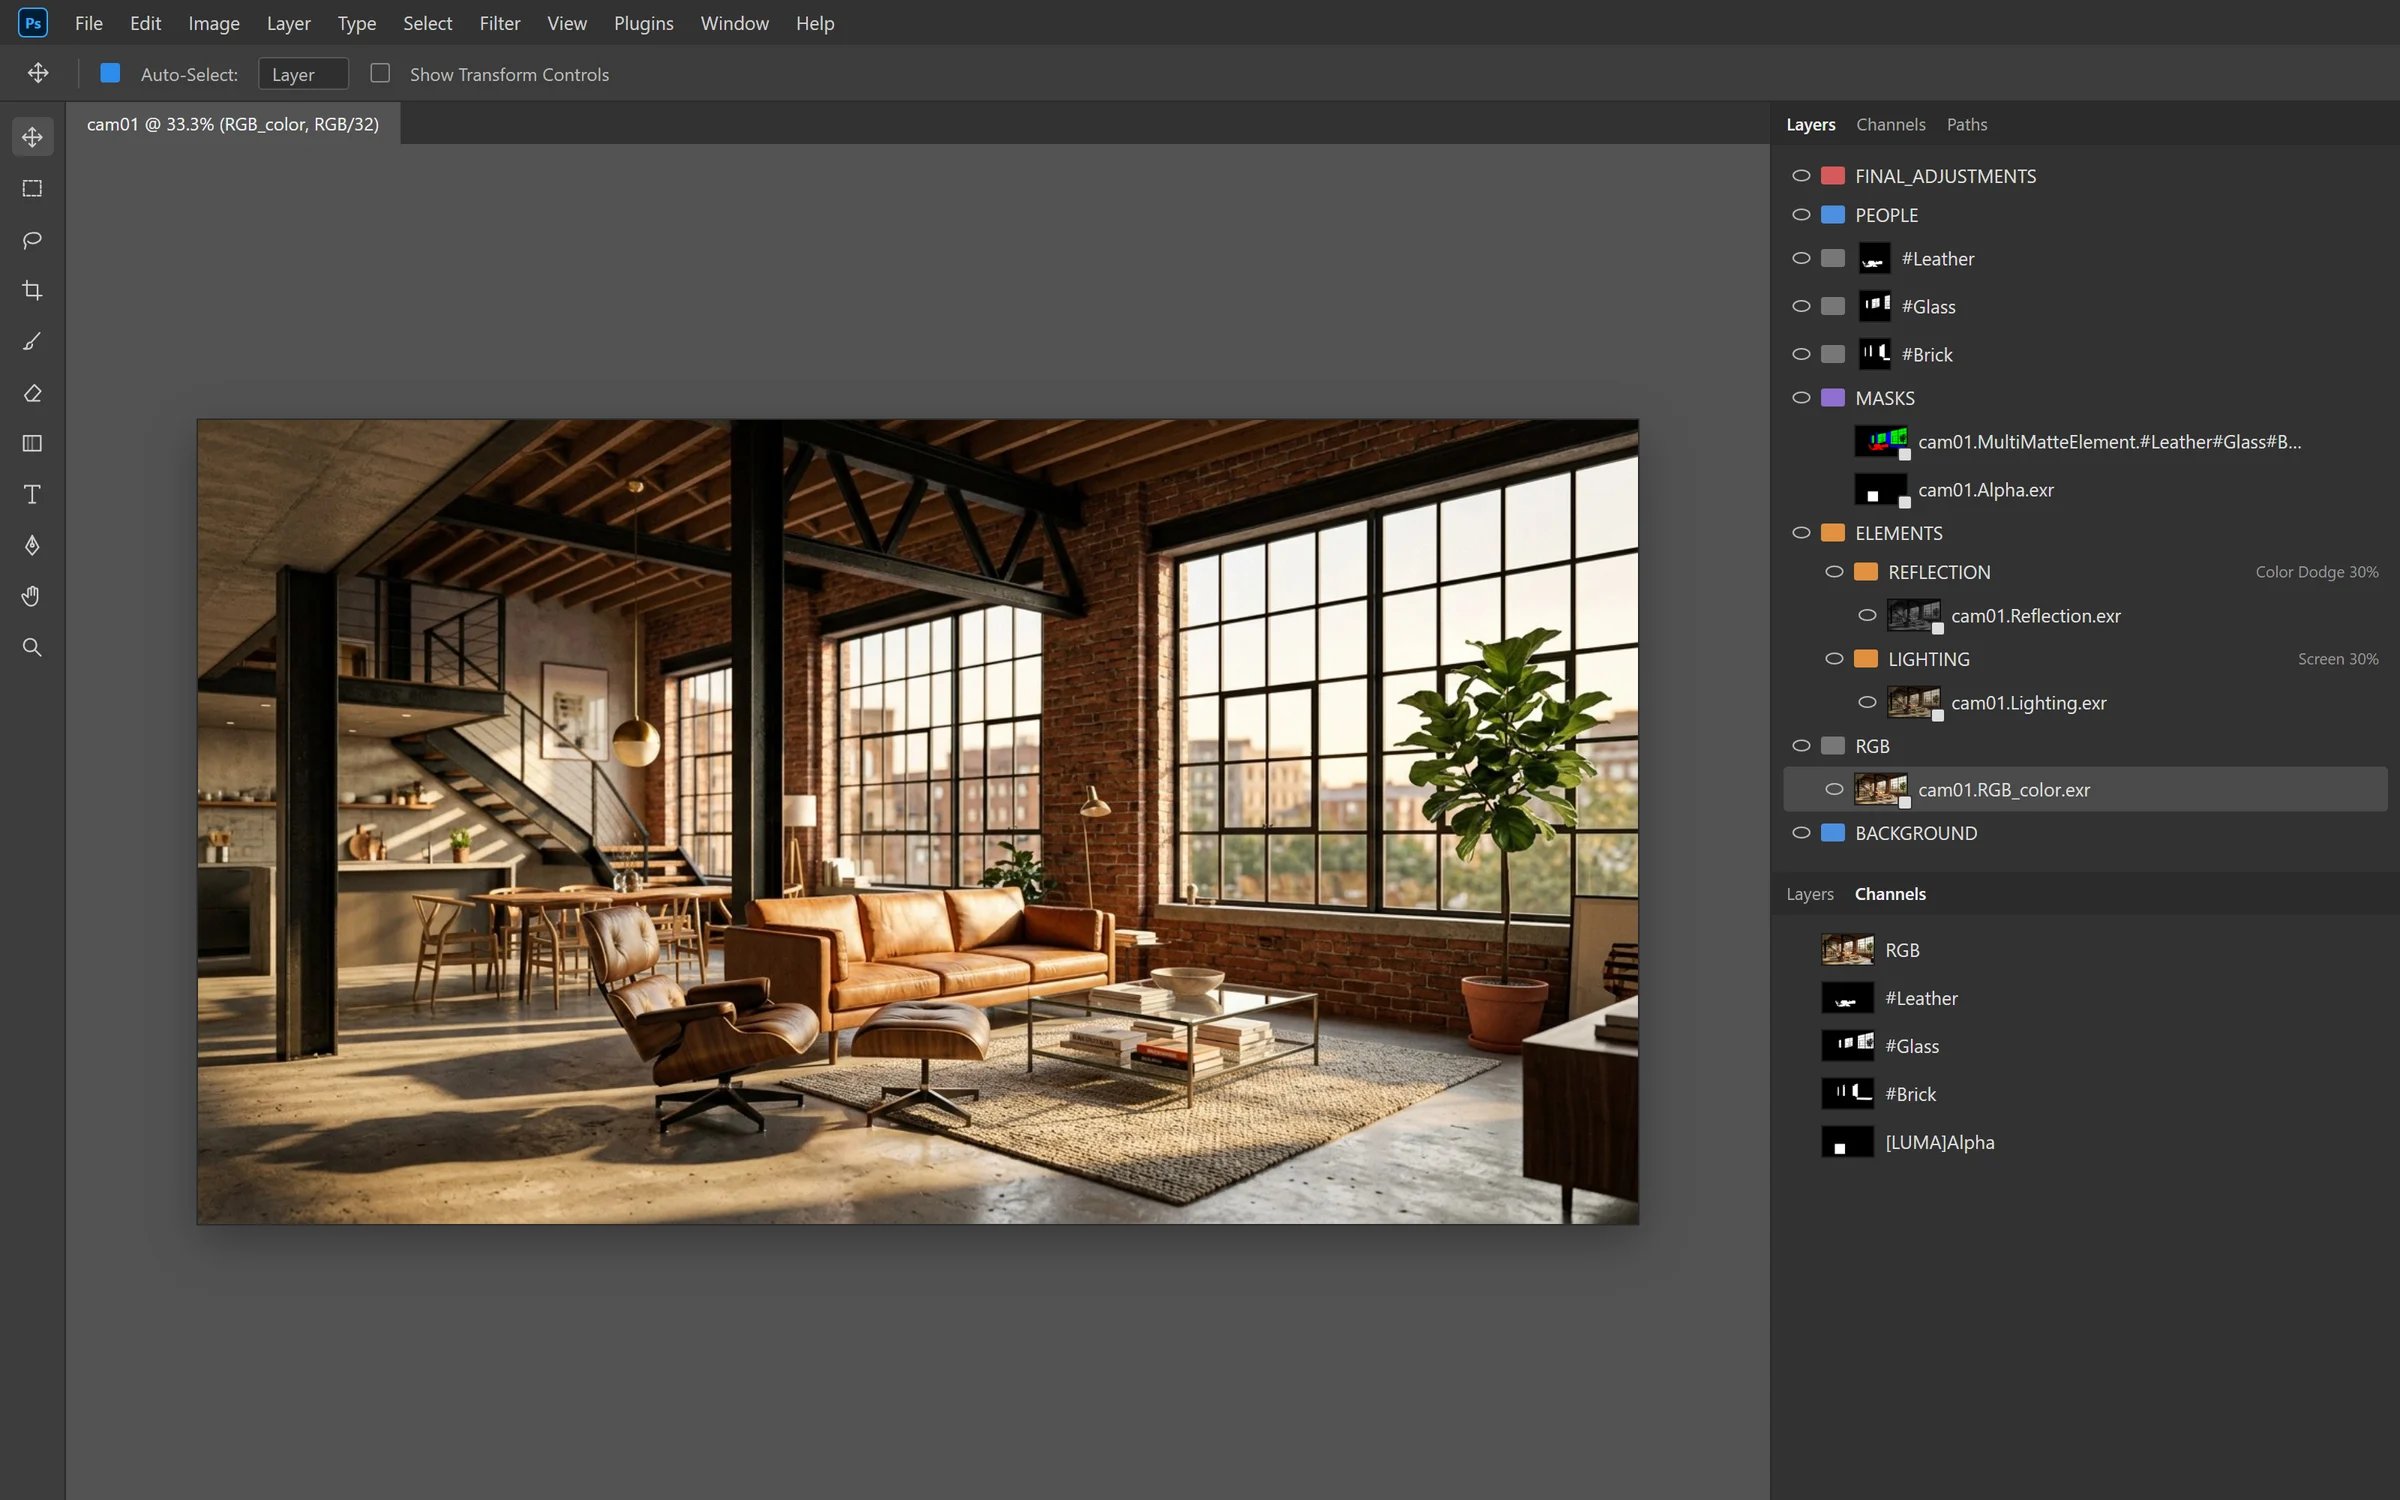
The built document: groups, smart objects, masked groups and saved channels
3. Done
Your new document is open in Photoshop. If you chose to save it, this step shows where. Press Build another to start again, or Done to go Home.Tips
- Placed layer names. Layers are named after their files by default. Choose Element name in Settings for short names like
Reflection. - Linked or embedded. Linked smart objects keep the PSD small, but the render files have to stay where they are. With Reset to 100% on, new documents embed them anyway, because baking a smart object embeds it.
- Keep the naming. If you rename a render element layer, keep the element name in it, or Update renders won’t find it later.